Guest blog by Josh McCabe
Patagonia is a photographer’s dream. It is home to some of the most dramatic landscapes on earth. Sharp granite peaks that tear through the sky, endless wind-shaped valleys, and, if you time it right, some of the deepest red and orange autumn foliage you will ever see.
In this short guide, I’ll break down timing for peak fall colours, my top five photo locations, and the essential gear you’ll want to bring to come home with strong imagery. Just know this upfront. Patagonia is not easy. The weather is one of the most unpredictable in the world, and conditions can change within minutes.
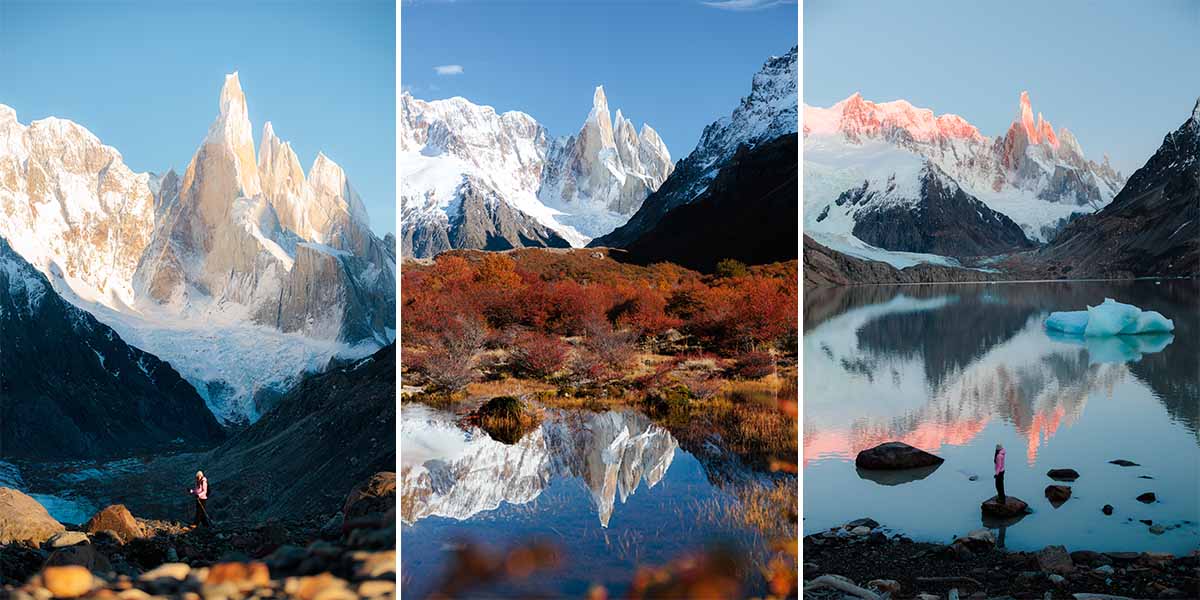
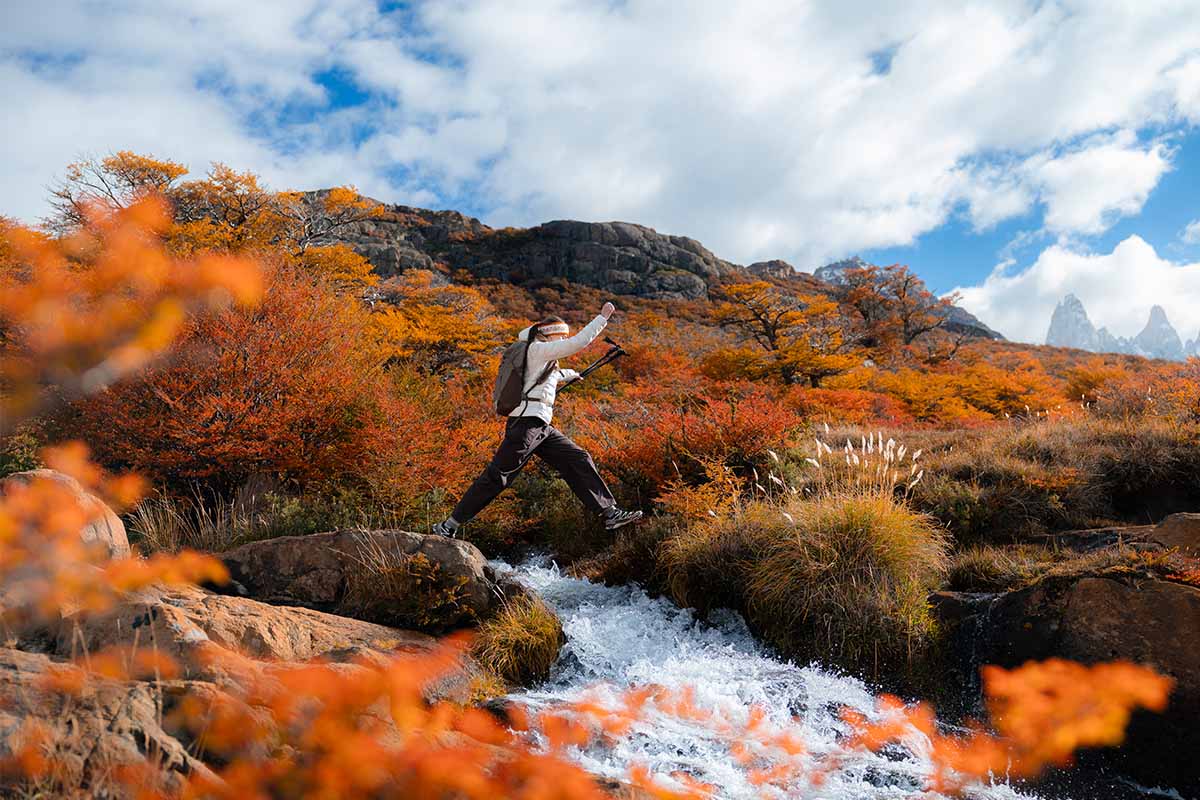 36mm, F/3.2, 1/2,500 seconds.
When to Go
El Chaltén, Argentina
To catch peak autumn colour here, I would aim for late April into early May, with some yearly variation depending on snowfall and temperature shifts.
On my most recent trip, colours peaked around April 5th and were already fading by April 7th. That window can move, but it tends to be short and intense. It is always better to arrive slightly early and warm tones in post than to arrive late and miss the foliage entirely.
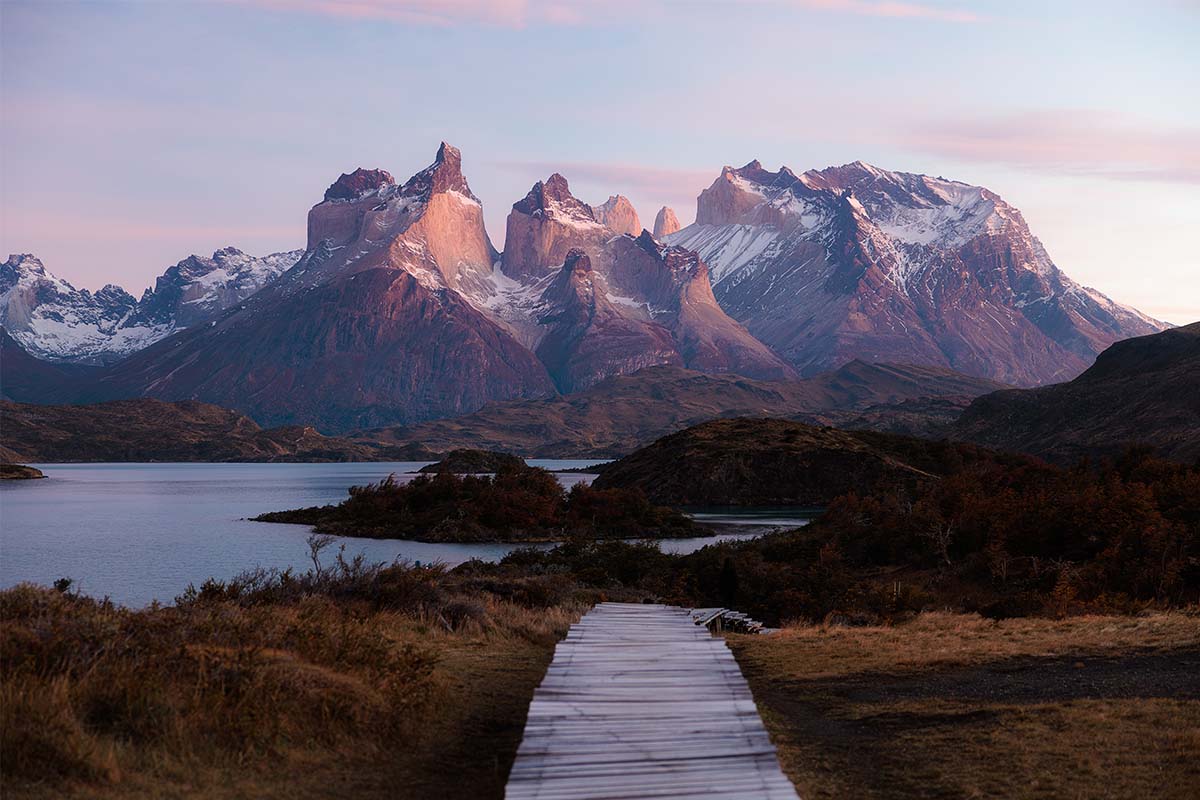
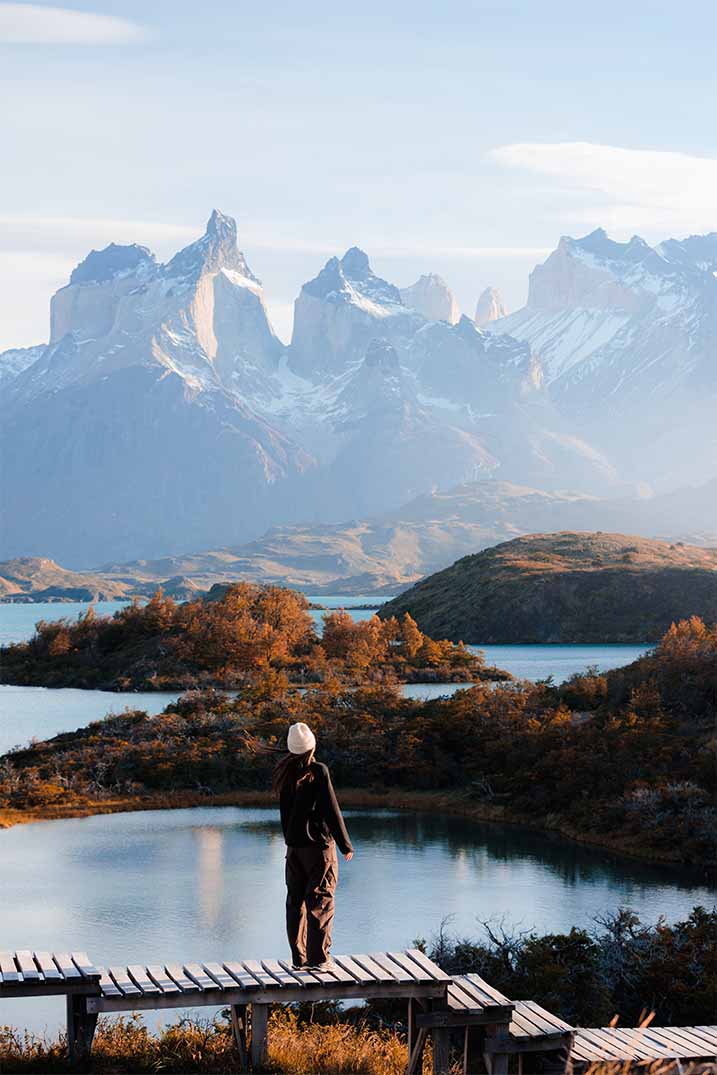
Torres Del Paine, Chile
Torres del Paine transitions later than El Chaltén. Lower-elevation valleys typically peak between April 15th and April 20th, with greater variability depending on wind conditions and early cold fronts.
The best strategy is to plan Argentina first, then move into Chile as the colour shifts.
Photography Gear to Bring
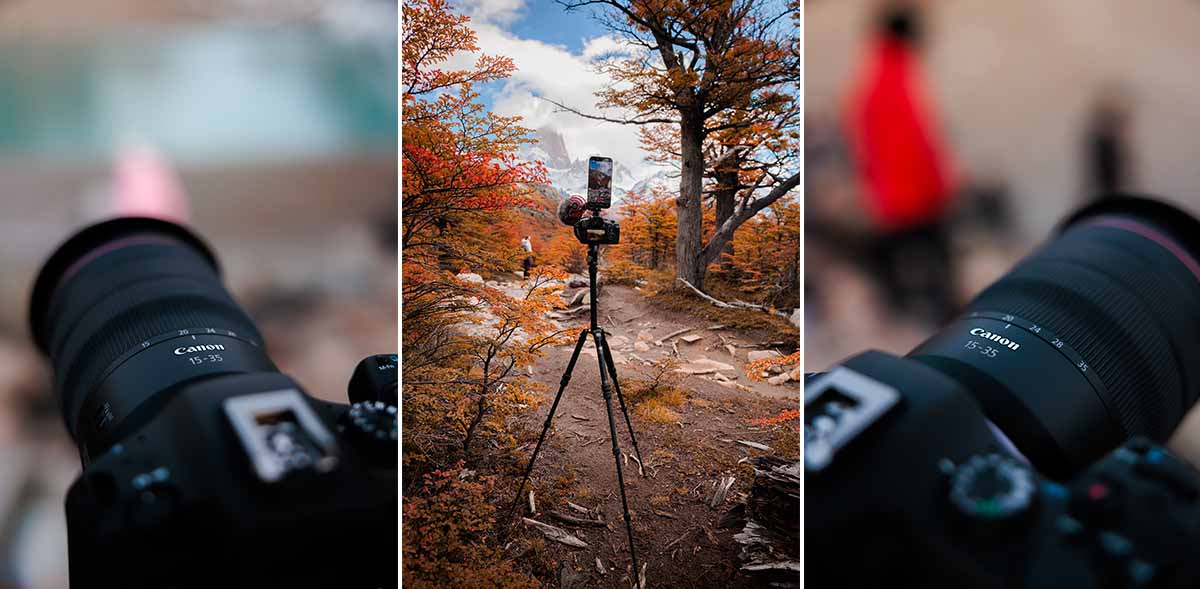 Left Photo: 42mm, F/2.8, 1/250 sec. Middle Photo: 24mm, F/4, 1/160 sec. Right Photo: 45mm, F/2.8, 1/250 sec.
- Main Body: Canon EOS R6 Mark III: You will want a weather-sealed camera to combat the crazy Patagonia weather. This camera is a hybrid and produces stunning photos and videos.
- Canon RF 15-35mm f/2.8: At many of the locations you visit, you'll be up close and personal with the mountains. A wide angle is a must for fitting them in.
- Canon RF 24-70 f/2.8: The most versatile focal range for Patagonia. This will likely live on your camera most of the time.
- Canon RF 70-200mm f/2.8: One of the most important lenses in the kit. It allows you to isolate peaks like Fitz Roy and compress layers of mountains, clouds, and light.
- DJI Mavic 4: Your mini drone will not cut it in Patagonia. You need a drone that can handle some wind, like this one. Drones are restricted in most areas of Patagonia. So, I wouldn’t say it is a must, but for a couple of scenes, it was nice to have.
- Peak Design Travel Tripod (Carbon Fibre): Lightweight enough to take on longer hikes and packs down surprisingly small. It handled the wild winds of Patagonia well.
- Filters - NiSi Variable ND, Polarizer, and Mist: If you plan to shoot video, you will need a variable ND to help control the light. This one also comes with a built-in polarizer and ¼ black mist, which removes unwanted digital sharpness and blooms your highlights, creating a dreamy look. Polarizer - I wouldn't shoot landscapes without one. It cuts harsh glare, brings the blue back into skies, and adds real vibrancy to colours.
- RODE Microphone: Essential if you're shooting video. Don’t forget your windsock. Patagonia sets the record for wind speeds.
- F-Stop Camera Bag: A weatherproof pack that protects your gear from the elements and is comfortable to carry for long hikes is a must.
- Ninja Ultra Monitor: This is a recent addition to my pack, but for video work, I do not know how I worked without one. Your compositions will improve when you have a properly sized screen to view them.
- Important smaller items: Lexar Pro 256 GB, Lexar SSD, NiSi Lens Cleaning Blower, Spare Canon LP-E6P Batteries, Logiix Piston Power 20,000 mAh Power Bank, Peak Design Capture Clip.
Location 1: Laguna Pehoe Boardwalk Trail and shoreline.
 50mm, F/2.8, 1 sec
This is one of the most accessible high-reward sunrise locations in Torres del Paine. Parking is nearby, and a short walk brings you onto the wooden boardwalk overlooking Lake Pehoé and the Cuernos del Paine. The best light is at sunrise. Arrive early for pre-sunrise glow, when soft alpenglow first hits the peaks. Most photographers leave immediately after sunrise, but some of the most beautiful light often comes 20 to 30 minutes later when golden tones spread across the valley.
Compositions here are endless. The boardwalk creates natural leading lines toward the mountains, while the shoreline offers opportunities for reflections on calm mornings. I used everything from wide-angle to telephoto here, depending on conditions.
 70mm, F/5, 1/800 sec.
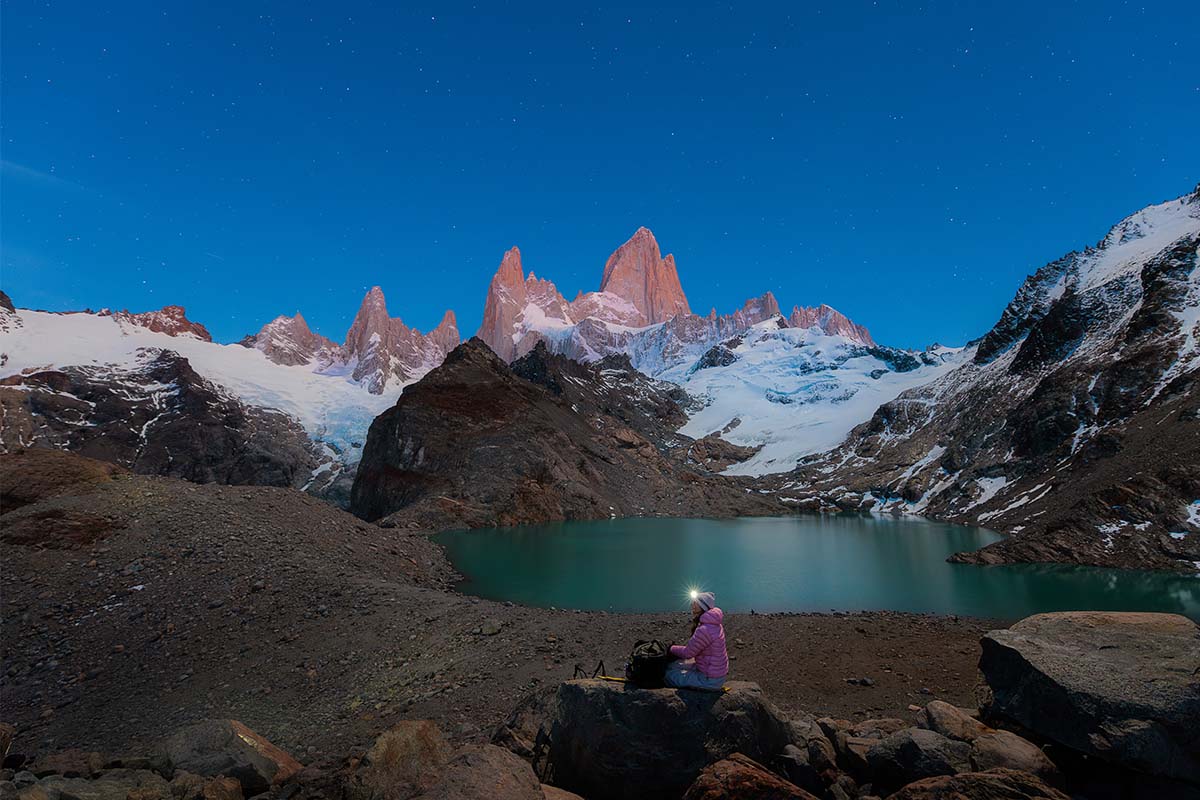
Location 2: Laguna Torre
This is not an easy location. You earn the view. A pre-dawn hike from El Chaltén takes you into one of the most dramatic alpine valleys in Patagonia. The Cerro Torre rises like a needle into the sky and is one of the most striking peaks in the region. Sunrise is once again the best light for alpenglow. On the return hike, always turn around frequently. The valley opens up with endless opportunities for autumn foliage framed against the peaks.
A wide-angle and a mid-telephoto setup will cover most situations here while keeping pack weight down on this longer trek.
 Left Photo: 100mm, F/3.2, 1/1000 sec. | Center: 56mm, F/4, 1/800 | Right Photo: 40mm, F/2.8, 1/160 sec.
Location 3: El Calafate - Glacier Perito Moreno
There are many options for seeing the glacier. We decided to go with the cost-effective route: we rented a car, drove ourselves there, and did the self-guided boardwalk. We went for the early morning light here and found it beautiful. It is busy, but there is so much space here to find your own area to shoot and see this massive glacier up close.
Be sure to stay until the afternoon if you’re looking to get a shot of Glacier Calving (massive chunks breaking off the size of buildings and splashing into the water). If you want to go on a boat tour, I’d recommend booking with Maria Turquesa, as they went the closest of all the boats we saw.
Although you are close, you will still want some zoom to capture the glacier's rugged details. My 70-200 was an ideal range.
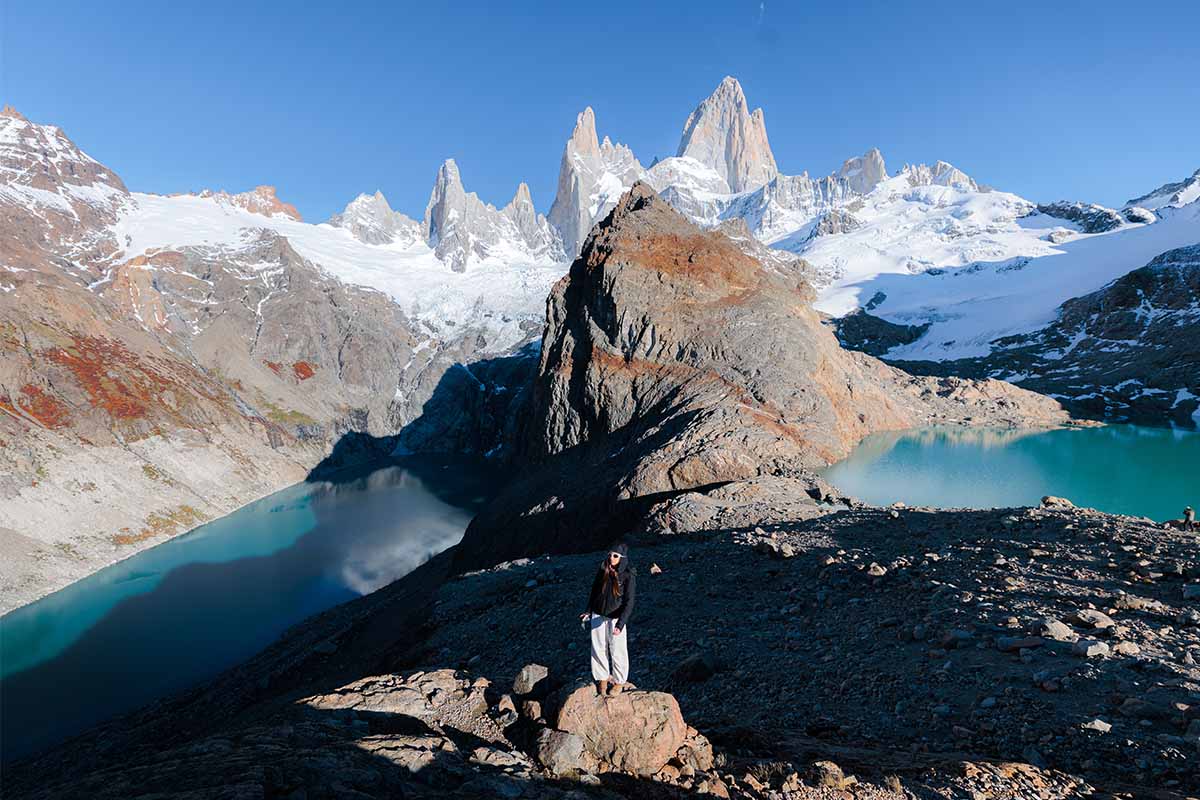
Location 4: The Laguna de Los Tres
 15mm, F/2.8, 5 Seconds.
No trip to Patagonia is complete without a hike to see where the Patagonia clothing brand got its logo from. Again, for the best light, we set off in the early morning to reach this spot for sunrise. You won’t be alone on this one; there will most likely be 100+ people joining you, even though it is a long hike. If you’d like to break up the distance, there is a campsite that is easy to book mid-way up.
I first shot this iconic scene from above, then walked down to the lake and was treated to some calm reflections of Mount Fitz Roy. I highly recommend walking over to the small viewpoint overlooking Lake Sucia.
You will need your wide-angle lens to capture both lakes in one shot.
 15mm, F/4, 1/800 sec.
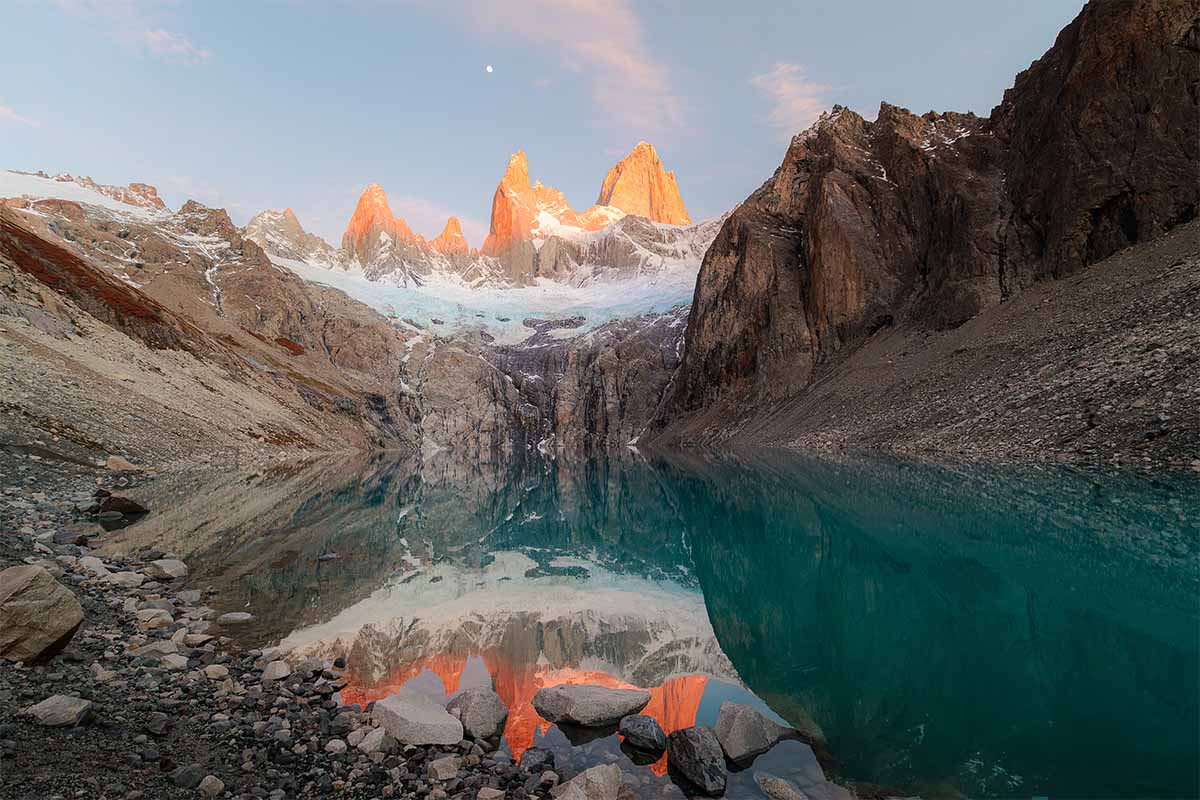
Location 5: Laguna Sucia
 15mm, f.28, 1/250
Now, after our last location, you’re probably hoping for something quieter. This will take us to the lake we shot from above, and you will most likely be alone here. But it comes with a slight catch. There is a tricky boulder field to navigate. Bring trekking poles and follow your map closely, and you will be fine.
For light, aim to be here for sunrise. The alpenglow here is stunning. The mountains again are up close and personal, so big you will barely fit the reflections in the lake. So, bring your wide-angle lens again and shoot right at the start of the lake to fit them in. (I was still half-asleep and missed this shot.)
After sunrise, if you are feeling confident and know how to navigate in the alpine, gain some elevation and catch some foliage shots from above.
Final Thoughts
Patagonia will test both your patience and gear. The weather is unpredictable, and the wind is constant. But when everything aligns, there are a few places on earth that compare.
I hope you have an amazing trip. If you still have any questions, drop them below, and I’ll be happy to help plan your trip.