A Guest Blog Post by Josh McCabe
After my adventures at home in the Canadian Rockies and hiking the Alps in Italy and Switzerland, I thought I had seen it all. Then, in December, I visited New Zealand, and the landscapes there took things to a whole new level.
This isn't just a travel post, it's a photographer's guide to the spots that moved me most, with honest tips on timing, gear, and what I wish I'd known before I got there. You’re guaranteed to come out with some amazing work if you follow these tips.
Why December?
December is, in my opinion, the sweet spot for visiting the South Island as a photographer. The lupins are at or near their peak (aim for around December 15th if you can), and the long days offer generous golden-hour windows. The only downside of long days is the short nights, but New Zealand's coffee scene makes short work of that problem. Even the gas stations have high-end machines turning out Flat Whites better than most cafes back home.
That said, December isn't without its trade-offs. Up in the alpine, you're rolling the dice a little. We hit some snow on the higher hikes, so if you're heading above the treeline, pack accordingly. But we found we could happily deal with a little snow at elevation in exchange for a valley full of purple and pink lupins below. For most photographers, that's a trade worth making.
Camera Gear I Bought
I shot everything on a Canon EOS R6 Mark III, paired with three lenses that covered almost every situation the South Island threw at me. Here are the main gear items I recommend for the trip.
- Canon EOS R6 Mark III: My body of choice for the trip. I’m a hybrid shooter, so having photo and video is a must.
- Canon RF 15–35mm f/2.8: My most-reached-for lens on this trip.
- Canon RF 24–70mm f/2.8: Versatile and sharp. Perfect for waterfall details, intimate compositions, and everything in between.
- Canon RF 70–200mm f/2.8: A great tool for compressing mountain backgrounds and isolating subjects within a busy scene.
- DJI Mavic 4: The aerial perspective this drone unlocked was something else entirely. Some of my favourite shots from the trip came from above.
- Peak Design Travel Tripod (Carbon Fibre): Lightweight enough to take on longer hikes and packs down surprisingly small.
- Peak Design Capture Clip: An absolute must for hiking. Your camera sits securely on your shoulder strap, always within reach, and you will never miss a shot.
- NiSi Polarizer: I wouldn't shoot landscapes without one. It cuts harsh glare, brings the blue back into skies, and adds real vibrancy to colours.
- NiSi Professional Lens Cleaning Blower: Loved this for quickly clearing rain and dust without risking smudges or scratches on the glass.
- RODE Microphone: Essential if you're shooting video. One tip: bring a windsock. New Zealand is famous for winds that can hit 100km/h, and it will ruin your audio without one.
- Canon LP-E6P Batteries: The days are long, and so are the shooting sessions. Pack spares. You will use them.
- Logiix Piston Power 20,000mAh Power Bank: On overnight trips, this was a lifesaver for keeping my camera, microphone, and iPhone charged when a wall outlet wasn't available.
Location 1: Lupins Along Lake Pukaki

There's no big secret to finding the best lupin shots along Lake Pukaki. You just drive slowly along the lakeshore, watch your left side, and pull over when you find a patch that frames up with Lake Pukaki in the mid-ground and Mount Cook rising behind it. That layered composition (lupins, turquoise lake, snow-capped peak) is one of the most iconic frames in all of New Zealand, and for good reason.
I shot this location with the 15–35mm wide-angle, and I'd make the same call every time. The wide field of view lets you pull in the foreground flowers, the lake, and the mountain in a single frame without feeling cramped.
Timing:
A couple of hours before and right at Sunset is exceptional here. But sunrise would be just as beautiful. Mount Cook is such a dominant peak that it catches alpenglow from both directions, so you really can't go wrong if you're out early or late.
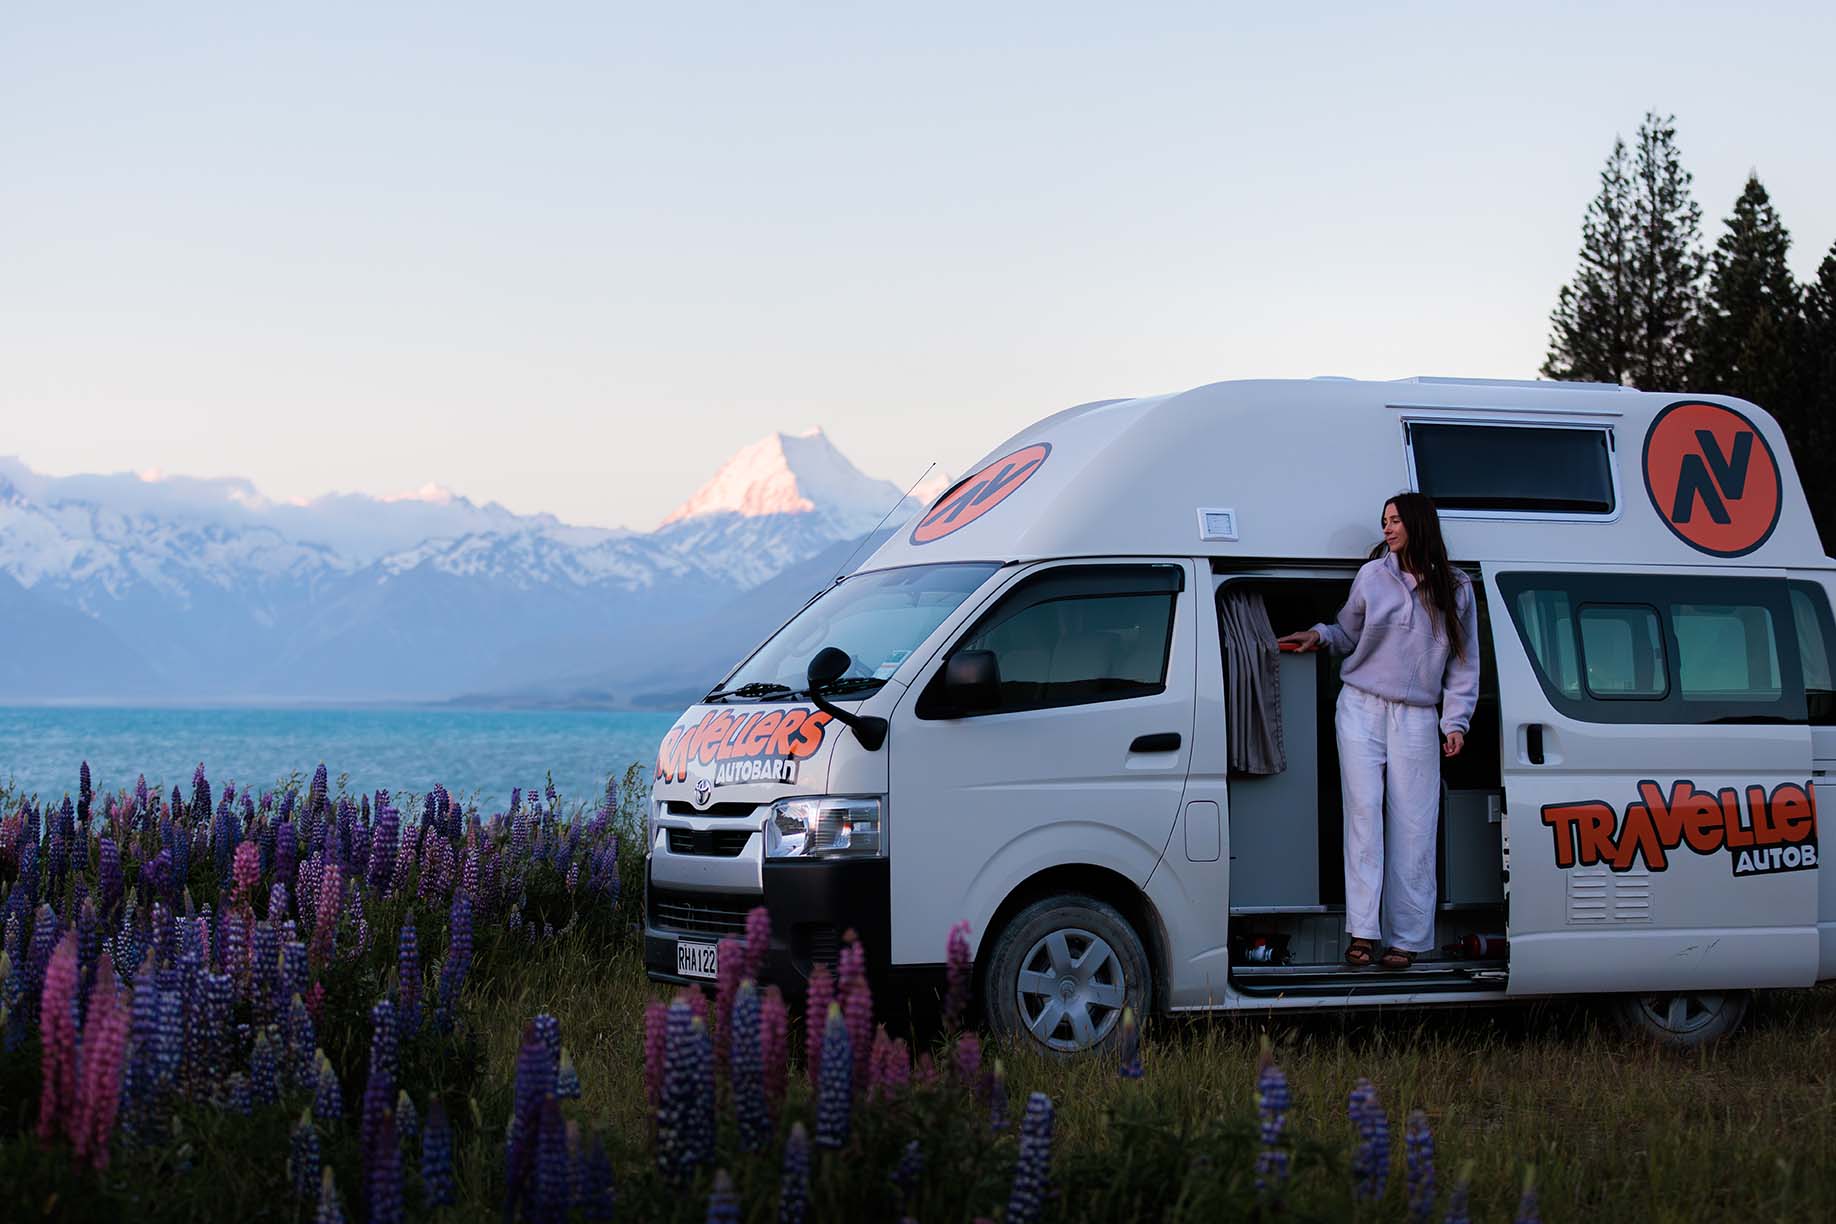
Photo Tips:
Get low among the lupins to maximize their presence in the foreground. Even a few inches of height difference changes the shot dramatically. Try a polarizing filter on the lake to cut glare and bring out that signature turquoise colour. Shoot in RAW as the dynamic range between a bright sky and shaded flowers is significant.
Location 2: Wilson Creek Chasm
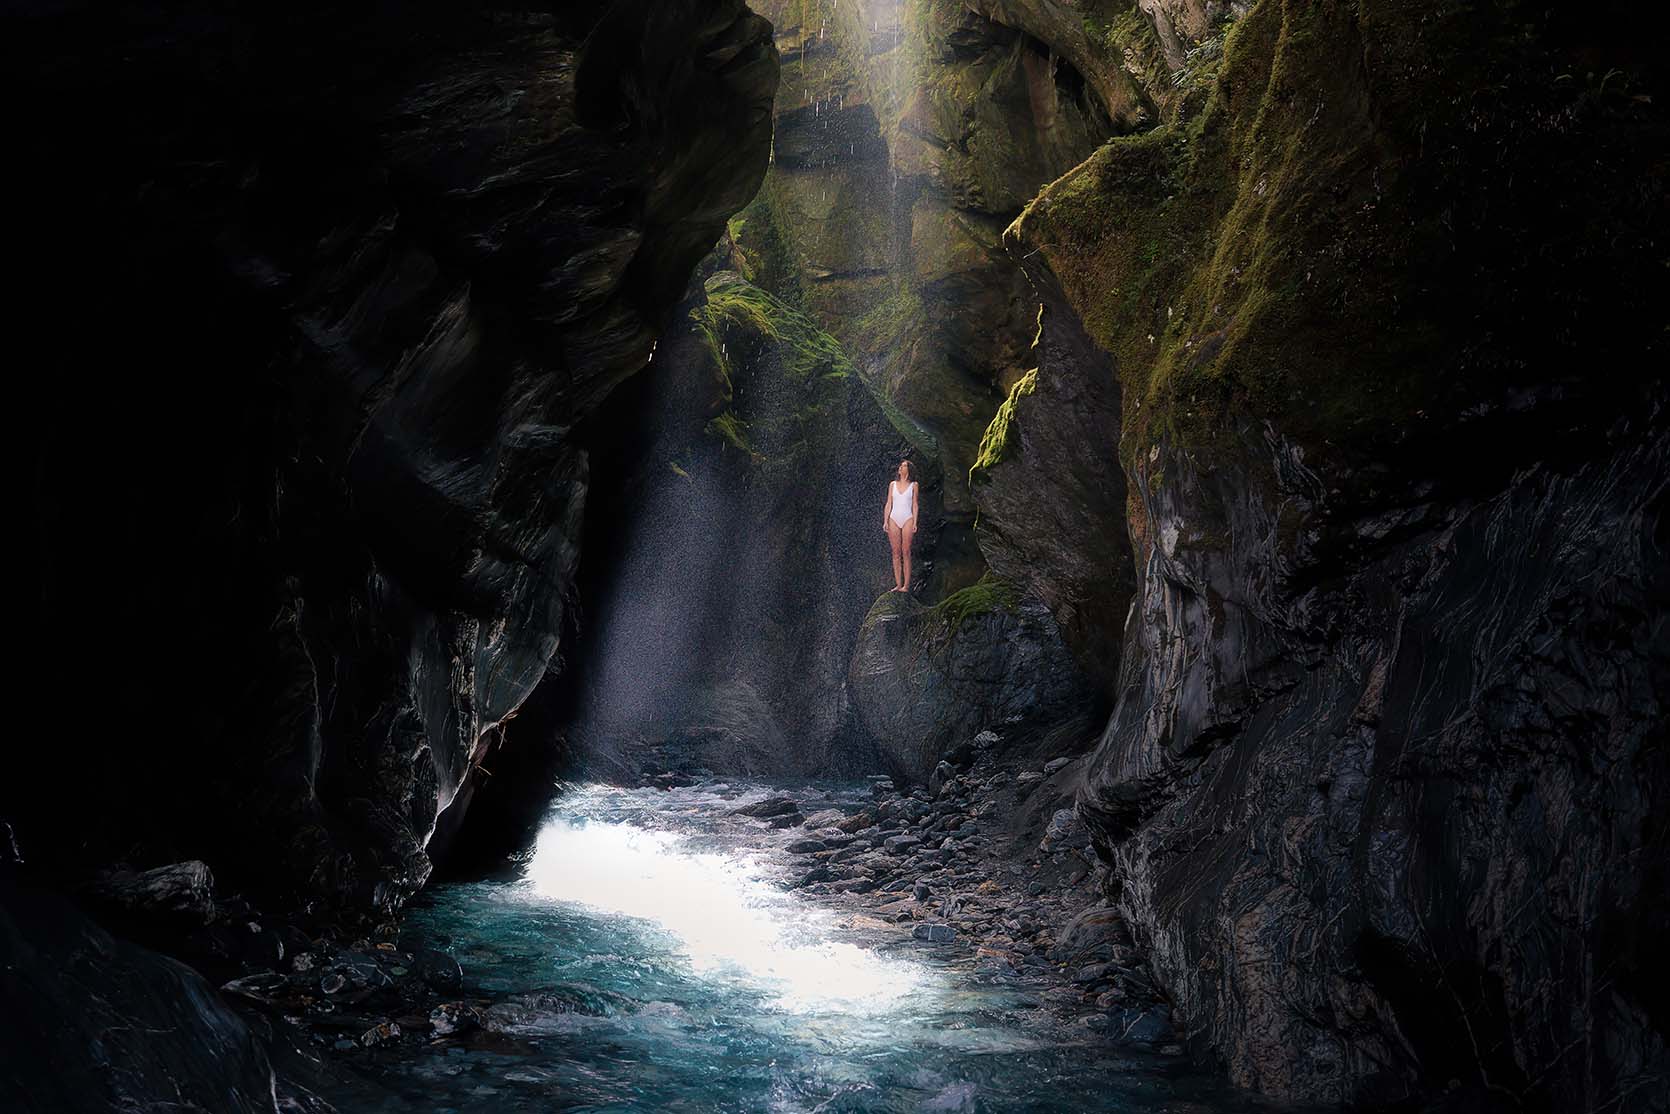
Wilson Creek Chasm is a hidden little gem tucked along the highway heading toward the West Coast. There are no signs pointing you to it, just a lightly beaten trail veering off from the road toward the sound of water. Easy to miss if you don’t know what you’re looking for.
You can safely explore about 150 metres into the chasm before the terrain becomes canyoneering territory that requires a guide. The great news for photographers is that the most beautiful section is well before that point, so no technical skills are needed. Bring sandals or watershoes to wade through the water.
One serious word of warning: do not visit if it has rained heavily in the days before, or if it's actively raining. A local friend told us she visited after rainfall, and the water was up to her neck, fast, powerful, and deeply dangerous. Water levels in chasms like this can change dramatically and quickly.
Timing:
In December, the sweet spot for light is between 2:45 and 4:00 PM. At this time, the sun angles directly into the chasm, backlighting the waterfall spray and creating a genuinely dreamy, almost ethereal atmosphere. Worth timing your drive specifically around this window.
Photo Tips:
A circular polarizer will help manage reflections on the wet canyon walls and make colours pop. Bring a lens blower and microfibre cloths, as the waterfall mist will find its way to your glass. Having a quick way to dry the glass between shots is essential. Slower shutter speeds (try 1/4s to 1s) will smooth the water beautifully. A small travel tripod will work well to keep the subject sharp during a lower shutter speed.
Location 3: Milford Sound
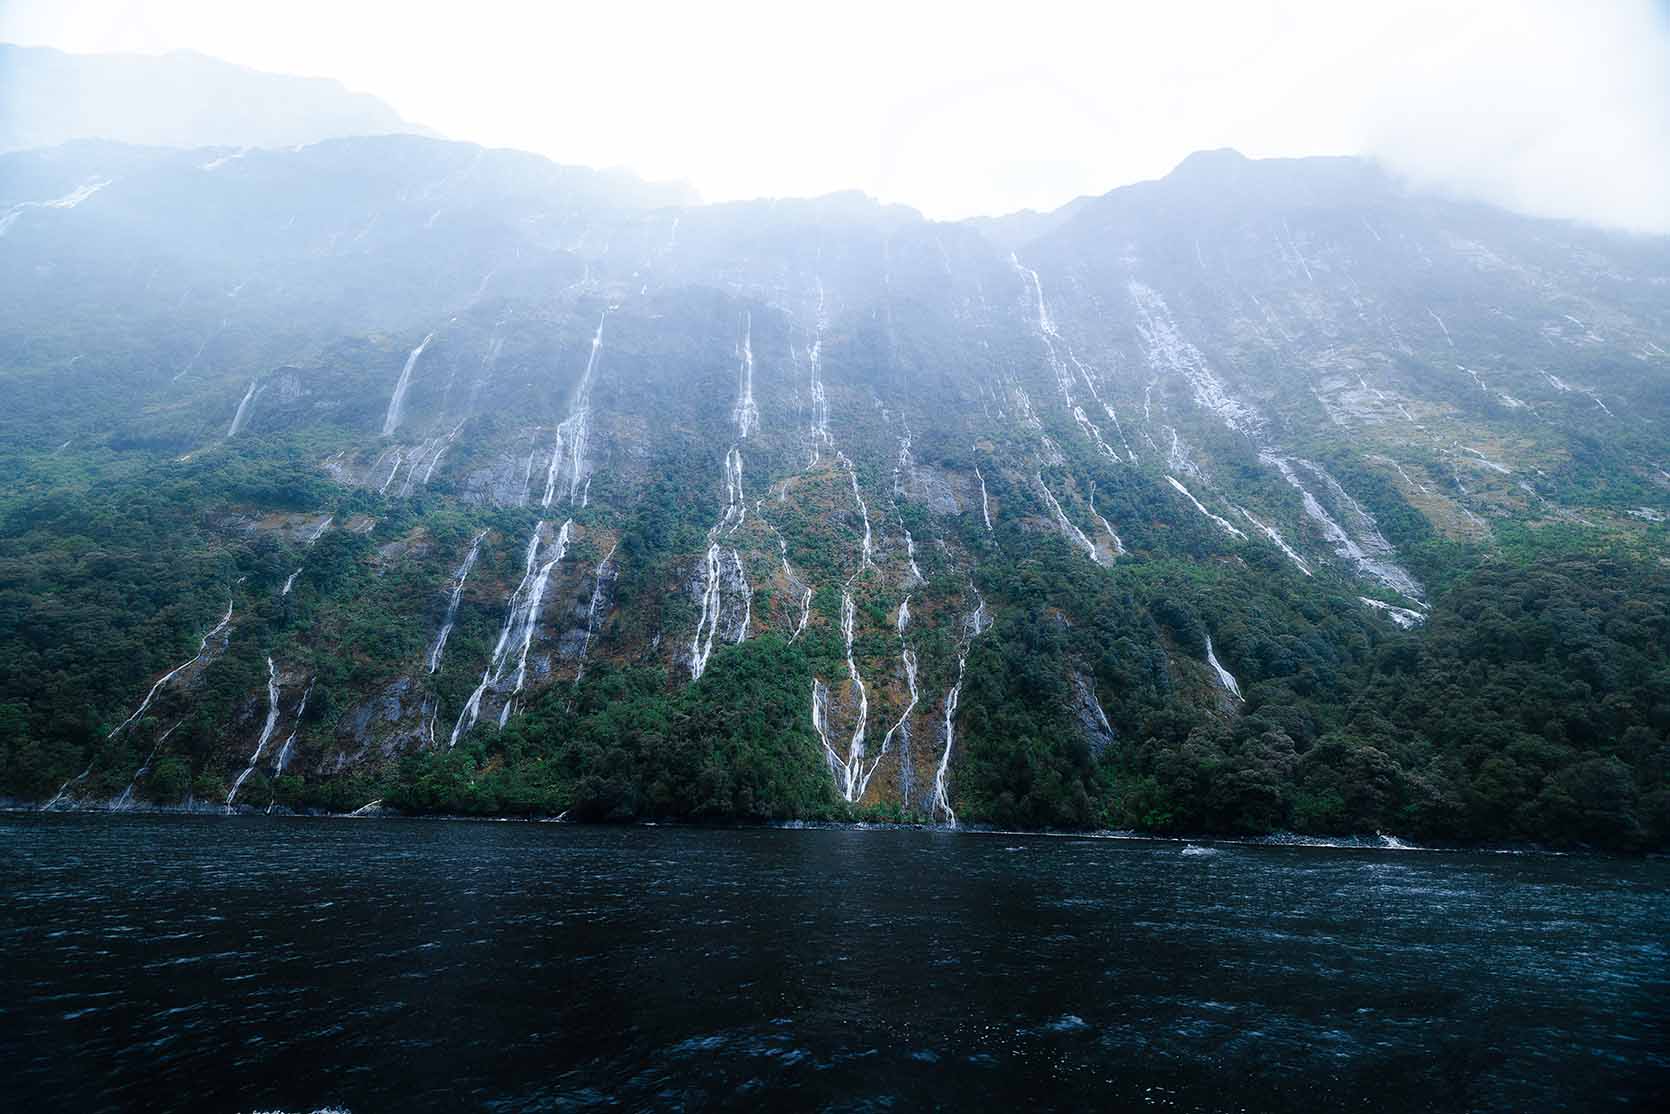
We made a deliberate choice that many people wouldn't: we went to Milford Sound on the stormiest day we could find. And it was one of the best photography decisions of the entire trip.
In calm weather, Milford Sound is stunning. In a storm, it becomes something else entirely, alive and dramatic. Waterfalls that only exist after rain cascade down every cliff face. The low cloud wraps around the peaks. The mood is exactly what this landscape seems to be calling for. Yes, we battled rain and wind. Yes, our gear got wet. No, I wouldn’t have changed a thing.
For the boat tour, go with Southern Discoveries. They're known for getting closer to the falls than other operators, which makes a genuine difference in the photographs. Their larger vessel also means more stable shooting positions and more room to move around. Even if it means more fellow passengers. Smaller boats may carry fewer passengers, but their size still makes it difficult to compose shots without fellow passengers in the foreground.
Photo Tips:
Lens protection is everything here. Bring a blower brush and multiple microfibre cloths, as the spray from waterfalls at close range is relentless. A rain cover for your camera body is also strongly recommended. I trusted the R6MKIII to keep the rain out naturally during the two-hour boat tour, and it did. The 24–70mm f/2.8 is the ideal lens on the boat. It gives you enough reach to fill the frame with falling water while still being wide enough to capture the surrounding cliffs for scale. Shoot in burst mode as you approach the falls. The spray creates constantly shifting light, and you want to capture the moment the droplets catch the light just right. In wet environments, you will, of course, want your polarizer to control the glare.
Location 4: Mount Cook National Park Road Shots
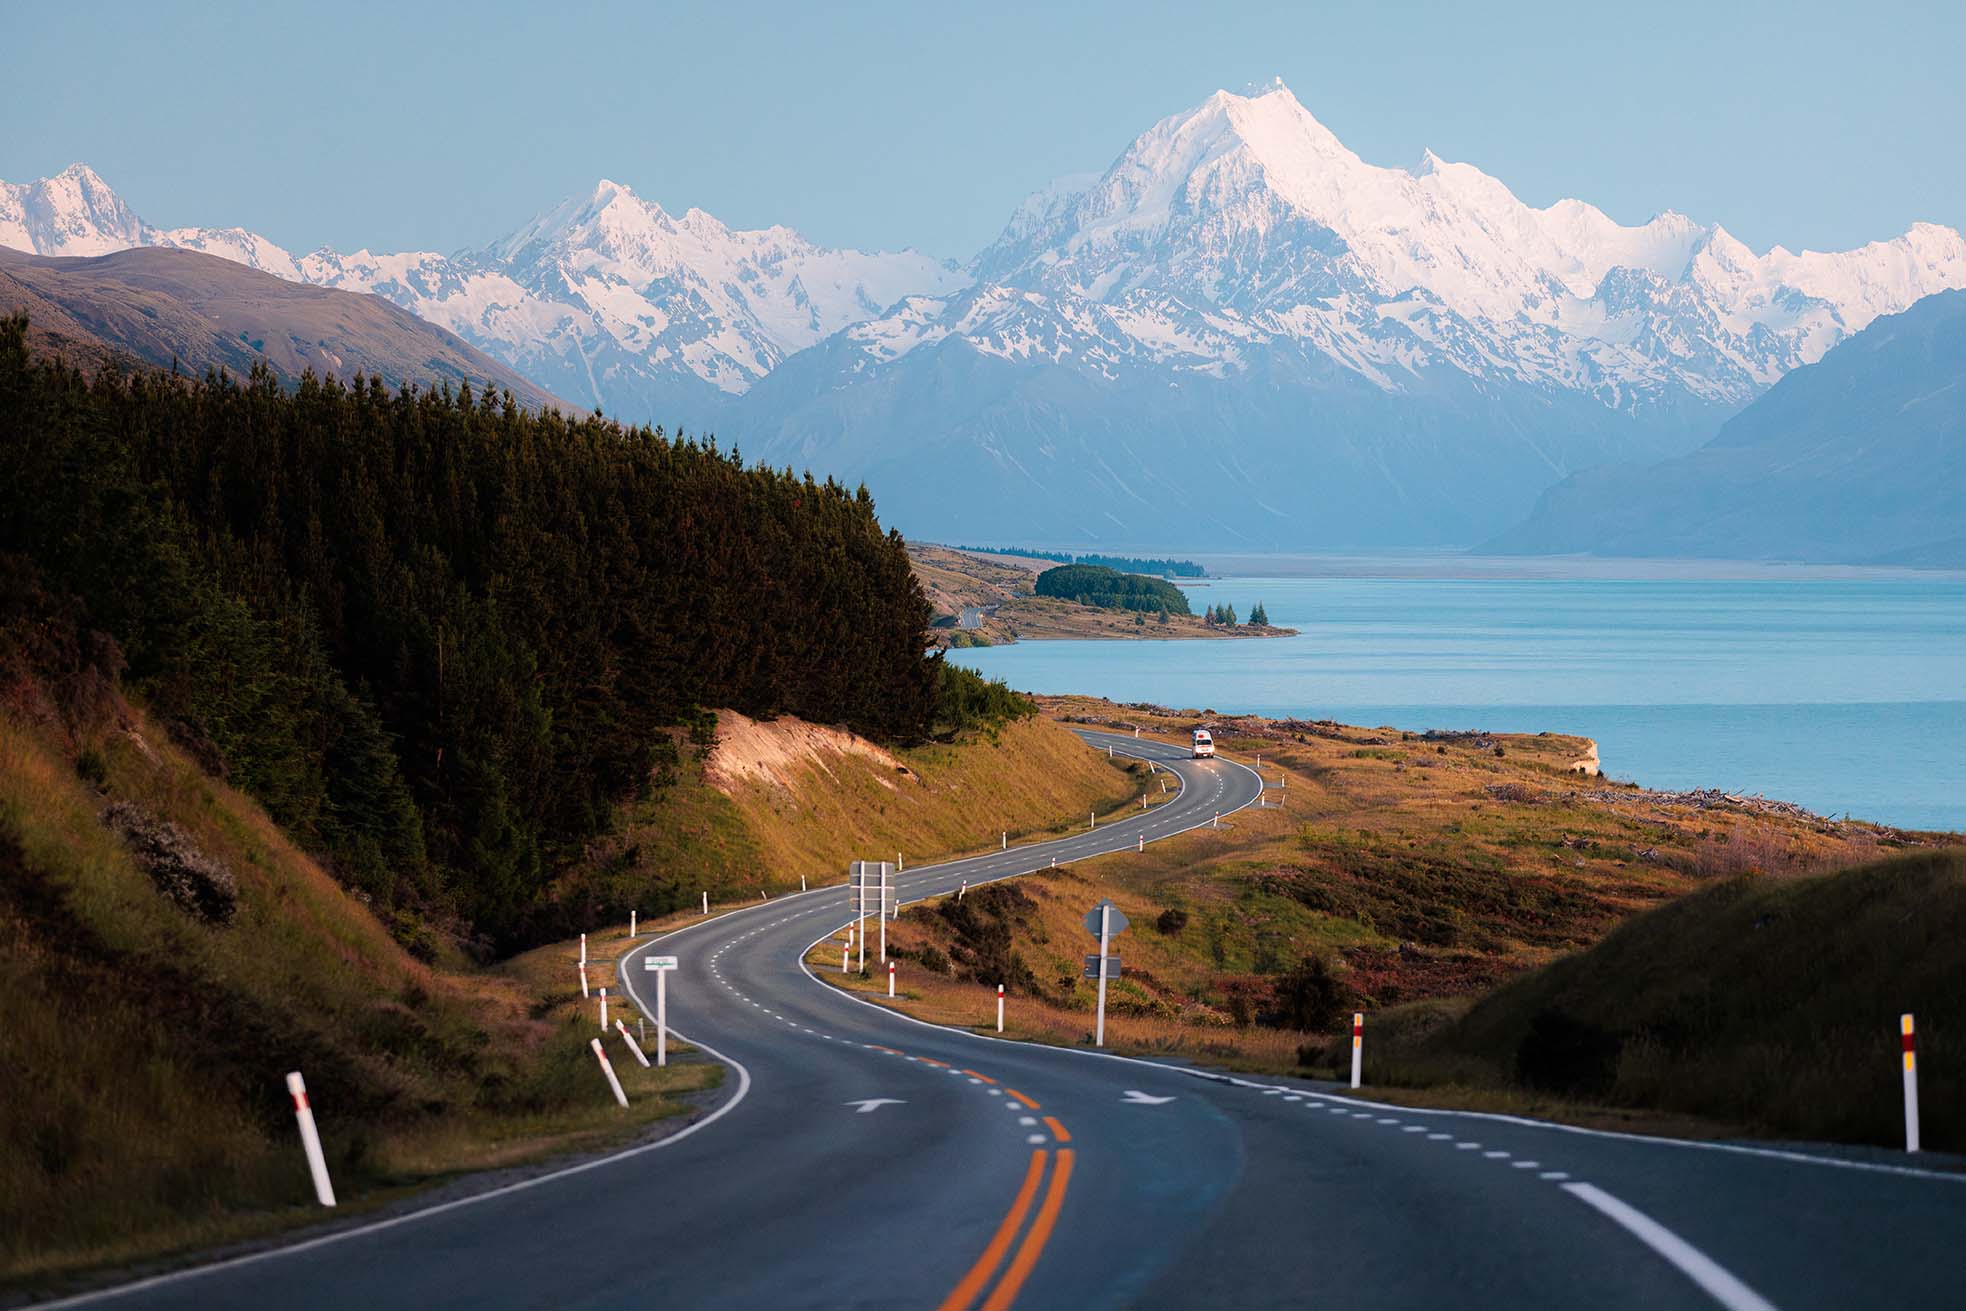
Mount Cook National Park rewards photographers who are willing to drive slowly and stop often. Some of our favourite images from the entire trip came from just pulling over along the main road at the right moment. Always pull over only when safe. Many accidents happen here because either people pull over at the wrong spot or drive on the wrong side of the road.
Peter's Lookout deserves a specific mention. The road here has a gentle S-curve leading directly toward Mount Cook, and in the right light, it's one of the most beautifully composed natural scenes you'll find anywhere. Sunrise and sunset both work, but we also loved waiting just a little after sunrise for the light to find Lake Pukaki and turn it that brilliant, almost impossible blue.
Photo Tips:
To bring justice to Mount Cook, I put on my Canon 70-200 2.8 and compressed it to show off Mount Cook's true size.
The Hooker Valley Track is the signature hike of the park, and even though it was closed past the second bridge during our visit, what remained open was still one of the most stunning walks we did. The track leads you toward the glacier with mountain walls rising on either side and a blue glacier stream rushing beneath you as you cross the bridges.
Location 5: Mueller Hut
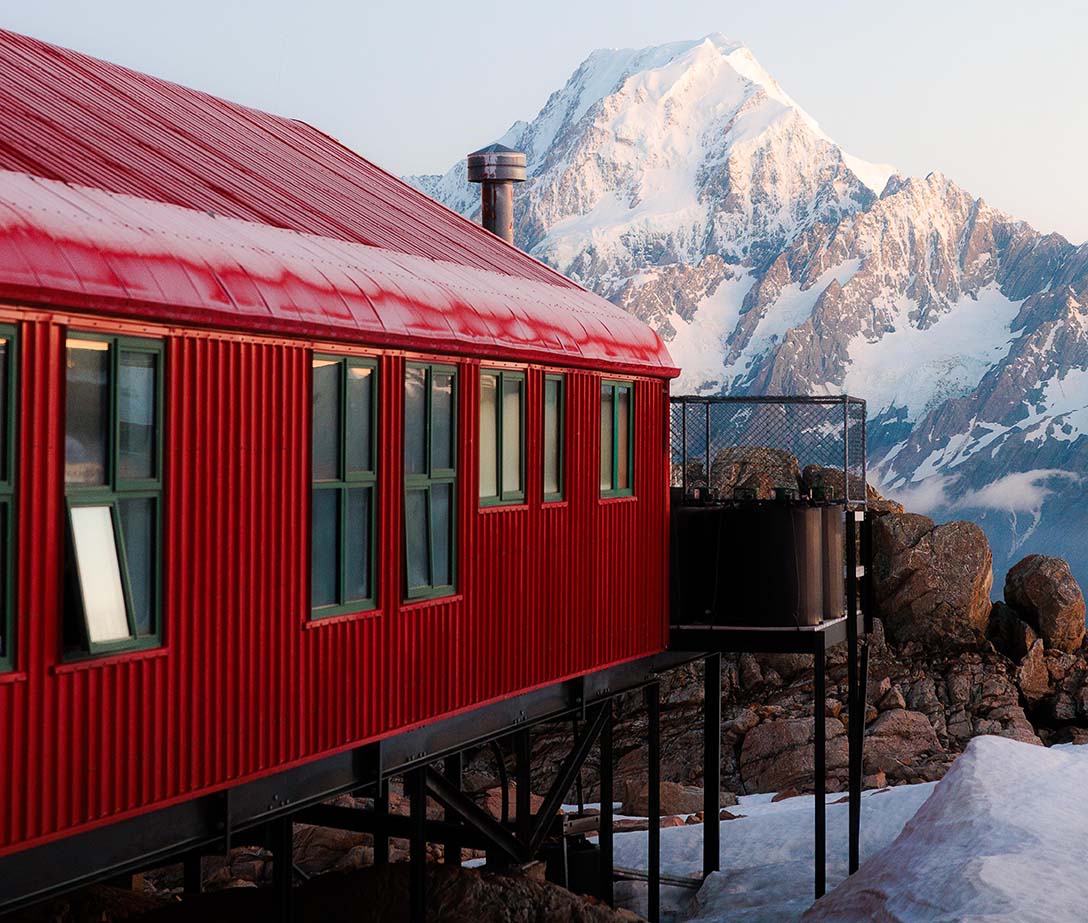
Mueller Hut was the highlight of the entire trip, and we almost didn't get there at all.
If you arrive in New Zealand and find the Mueller Hut bookings are full (which they almost always are), most people give up. We didn't. We kept refreshing the booking page throughout our trip, and eventually, a cancellation opened up. We took it immediately, and somehow the weather aligned perfectly.
The hike up takes about 4 hours, and it's serious: steep, relentless, and absolutely worth it. Because of the effort involved, I decided to pack light on camera gear. That meant leaving the heaviest lenses behind and relying primarily on my wide-angle and 24-70.
At the hut, you don't need to bring a stove, propane, or a sleeping pad, as that gear is provided, which makes a real difference to your pack weight and frees you up to bring a few camera essentials you'd otherwise leave behind.
Blue hour at the hut was one of my favourite shooting times of the entire trip. As the sky faded and the hut's warm interior lights began to glow against the darkening peaks, the scene became magical, and the cozy hut glowed. You'll need a tripod for these shots, as shutter speeds get long fast in low light.
At sunrise, walk up to the nearby ridge above the hut. This is where the tenters camp, and in the morning light, you'll find their colourful tents lit from the side by the first rays coming in from the east. It makes for a beautiful, human-scaled subject against the immensity of the surrounding peaks.
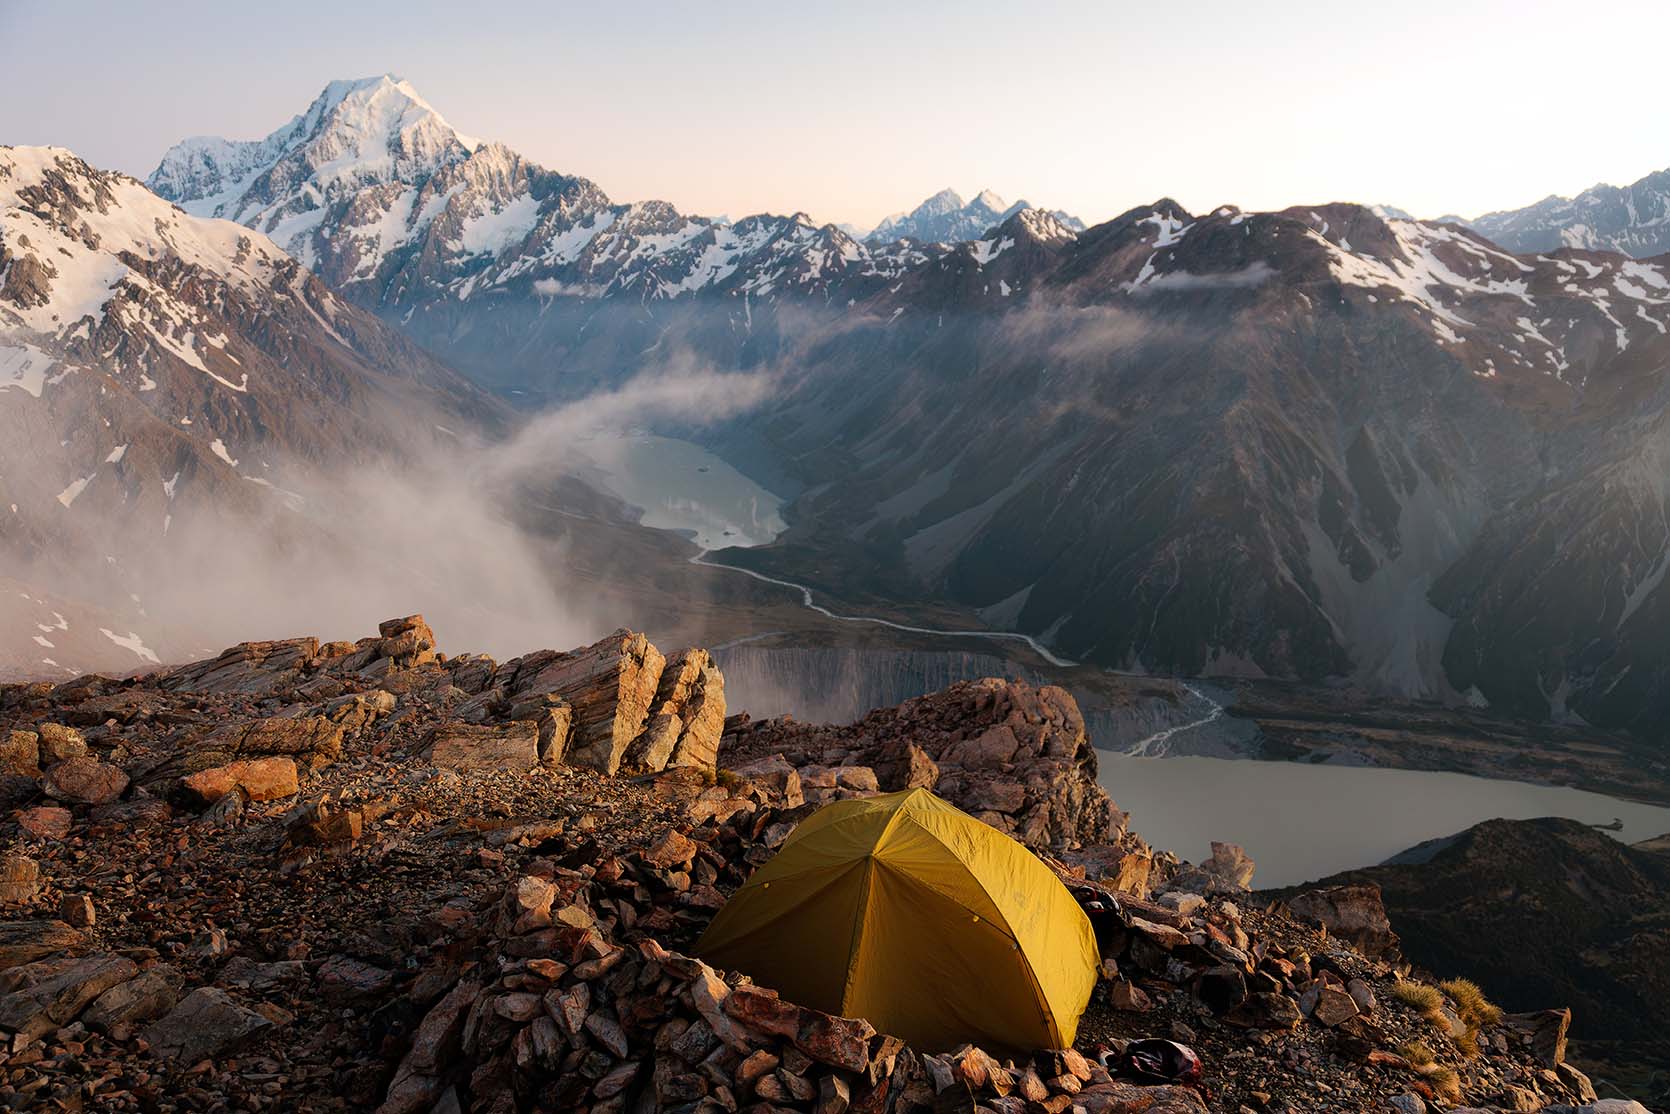
Photo Tips:
Pack a lightweight travel tripod. You'll be grateful for every gram you save on the hike up, but you'll absolutely need stable support for night and blue-hour shots. Use a Peak Design Capture Clip to carry your camera securely on your shoulder strap during the four-hour climb. It keeps your hands free for scrambling or hiking poles while giving you quick access when a shot presents itself on the way up. Wide angle is king here. The hut sits in a bowl of peaks, and you want to capture the surrounding environment, not just the hut itself. For night shots, set your focus manually to infinity before it gets fully dark, so you're not hunting for focus in blackness. Bring extra batteries, as cold nights at altitude drain them faster than you'd expect.
Final Thoughts
I came to New Zealand with high expectations. It exceeded all of them. The South Island is a landscape photographer's dream. Every two hours of driving presented a completely new landscape. Come in December if you can, stay flexible, keep refreshing that Mueller Hut booking page, and don't be afraid to shoot in the rain. Some of the best frames you capture will come from the wildest weather.
Shoot often, explore wide, and let the landscape surprise you.
All images shot on Canon EOS R6 Mark III with RF 15–35mm f/2.8, RF 24–70mm f/2.8, and RF 70–200mm f/2.8.