Understanding exposure is critical to ending up with the photo that you envisioned in your head. If the image has been taken brighter or darker than it should be, then it will either look washed out, or muddy and faded. So our goal is to help you understand in the best possible way how to get the “correct” exposure for any photo.
Aperture, shutter speed, and ISO affect how much light is transmitted to the sensor and play a role in the outcome of the image. For example, these settings change how much is in focus, if the photo has motion blur or is sharp, and how much noise is present in the picture.
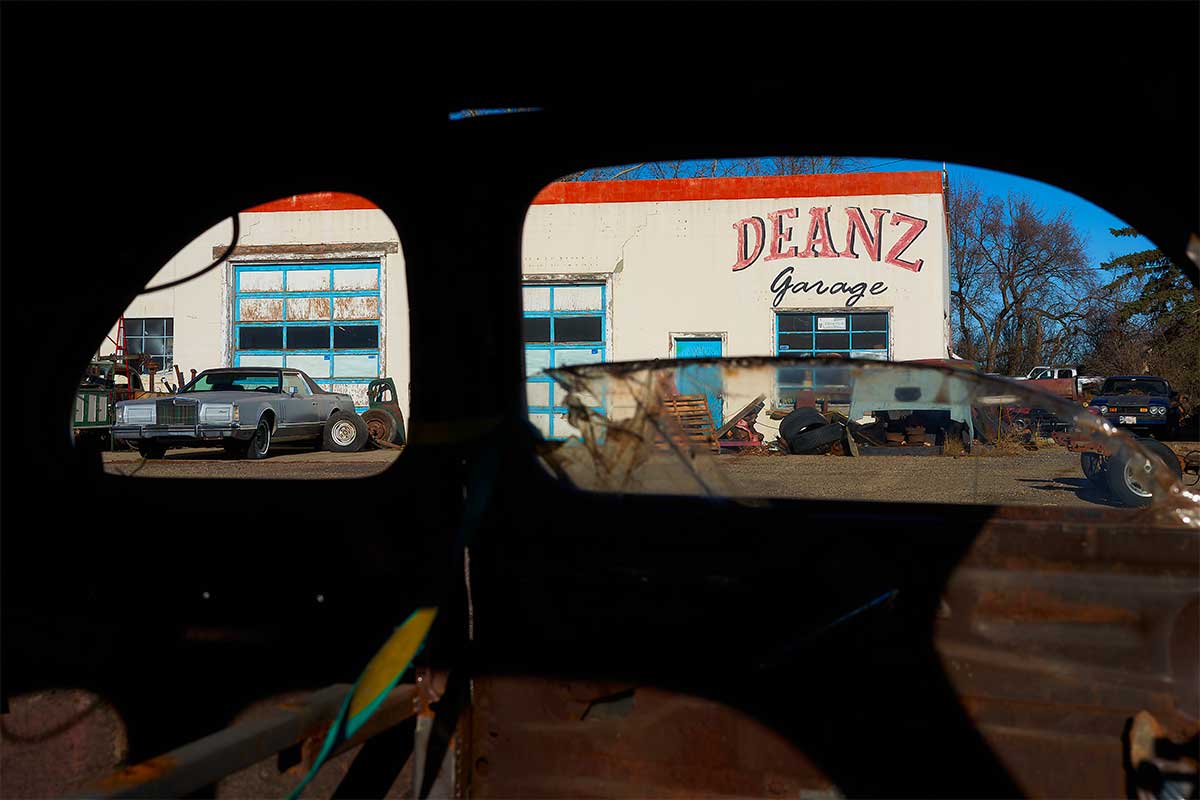 This image would likely read into the negatives on your exposure meter because of the dark area, but you want to expose for the main subject
This group of settings is often referred to as the exposure triangle, but the settings don't have any relation to each other in that configuration, so we're not going to refer to it as such. In addition, we don't want to rely on memorization of settings to learn how to use our cameras; it will only take longer and be more frustrating. So instead, we will learn what each setting changes to understand better why we use each one.
Think of a sponge. If we want to fill it with just the right amount of water from a hose so that it is entirely wet, but the water is not leaking out we need to control how much water is hitting it and for how long. You can think of your aperture as the diameter of the hose; the wider it is, the more water (or light) comes through. Your shutter speed is how long the hose is turned on, and your ISO is how thick the sponge is. A thin sponge is like a high ISO, easy to fill up, but not as useful as a thicker sponge.
To know if your photo will turn out with the proper exposure you want, you will be looking at the exposure meter in your camera's viewfinder. There will be a little scale with a “0” in the middle and positive and negative 1, 2, and 3's left and right of it. This represents your RELATIVE exposure value.
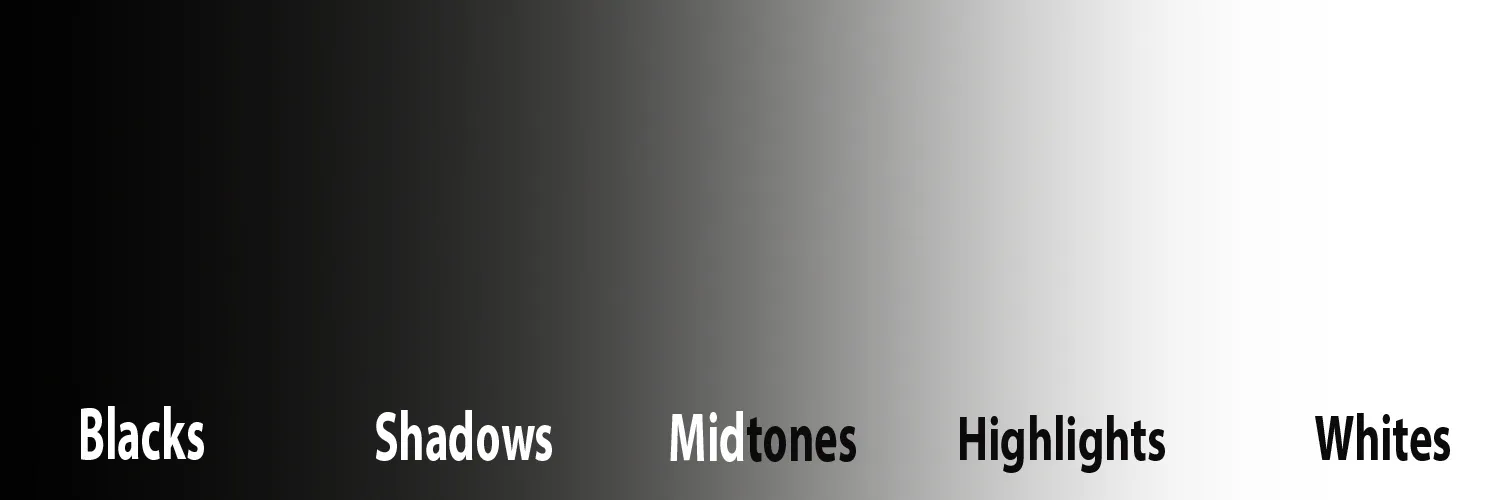 When lined up at "0" on your scale, you get that middle-grey tone or the equivalent of that middle-grey in colour
When the light meter is lined up at 0, you will get a middle tone exposure. This does NOT mean that the photo is perfectly exposed, simply that it is in the middle of the tonal range. Correct exposure is going to be what you envision. For something dark and moody, you will probably want to line your meter up at -2 or maybe even more. If you are shooting a portrait, you probably want the skin tone to be+1 or +2. This scale is meant to be a reference point, not a target to hit the “0” mark.
For example, the photo used as the title image for this blog would probably be close to about +2 as an average reading on the scale in a camera because there is so much white creating a very bright reading. But that doesn't mean its overexposed, it means that there is more white tones throughout the image.
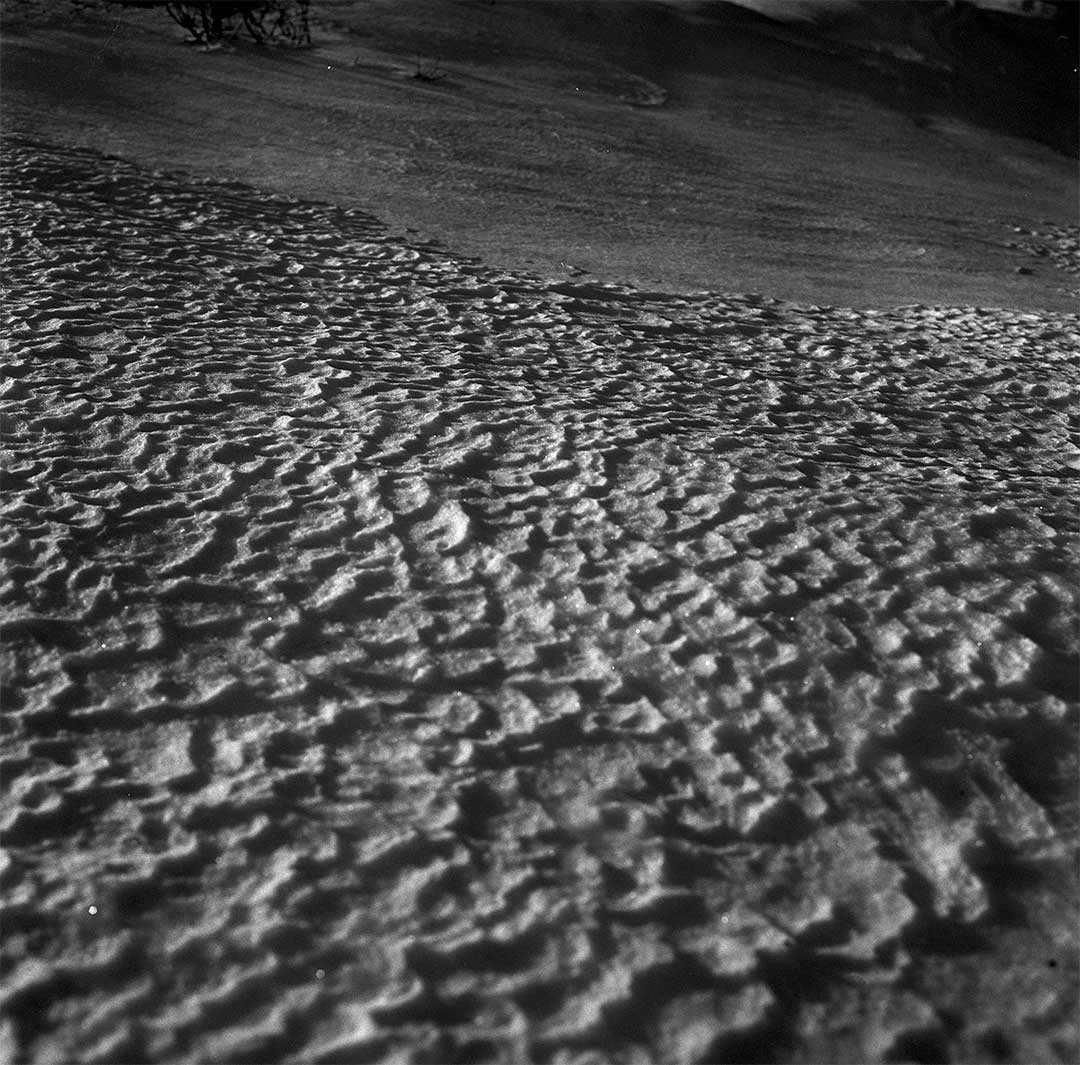 This is what happens when you take a photo of snow lining up the meter at "0", you get a middle tone image instead of white.
There are different metering modes available in modern digital cameras that will evaluate various areas of the frame, from an average of the whole image to a central spot. A spot meter can be very useful when you want to ensure that your exposure is bang on for one specific part of the frame because it will only read the exposure on that one particular spot, but play around with the different modes on your camera and see what works best for you!