Compositing has always been one of the most time-consuming editing techniques out there. From painstakingly cutting out your subject using masks of various shapes and intensities to the hours spent matching the lighting and colours of your scene so that your subject and photo blend perfectly – it can be a nightmare. Thankfully, a much more elegant solution to creating beautiful composite images exists. The best part? It only takes less than ten clicks.
Enter Photoshop's Auto Blend Layers feature. While not necessarily a new feature, Auto Blend has quietly been receiving updates over the years and has vastly improved since its initial introduction in 2019. We created the image below in about 2 minutes. Let's see how we did it!
Step 1: Select and import your background image.
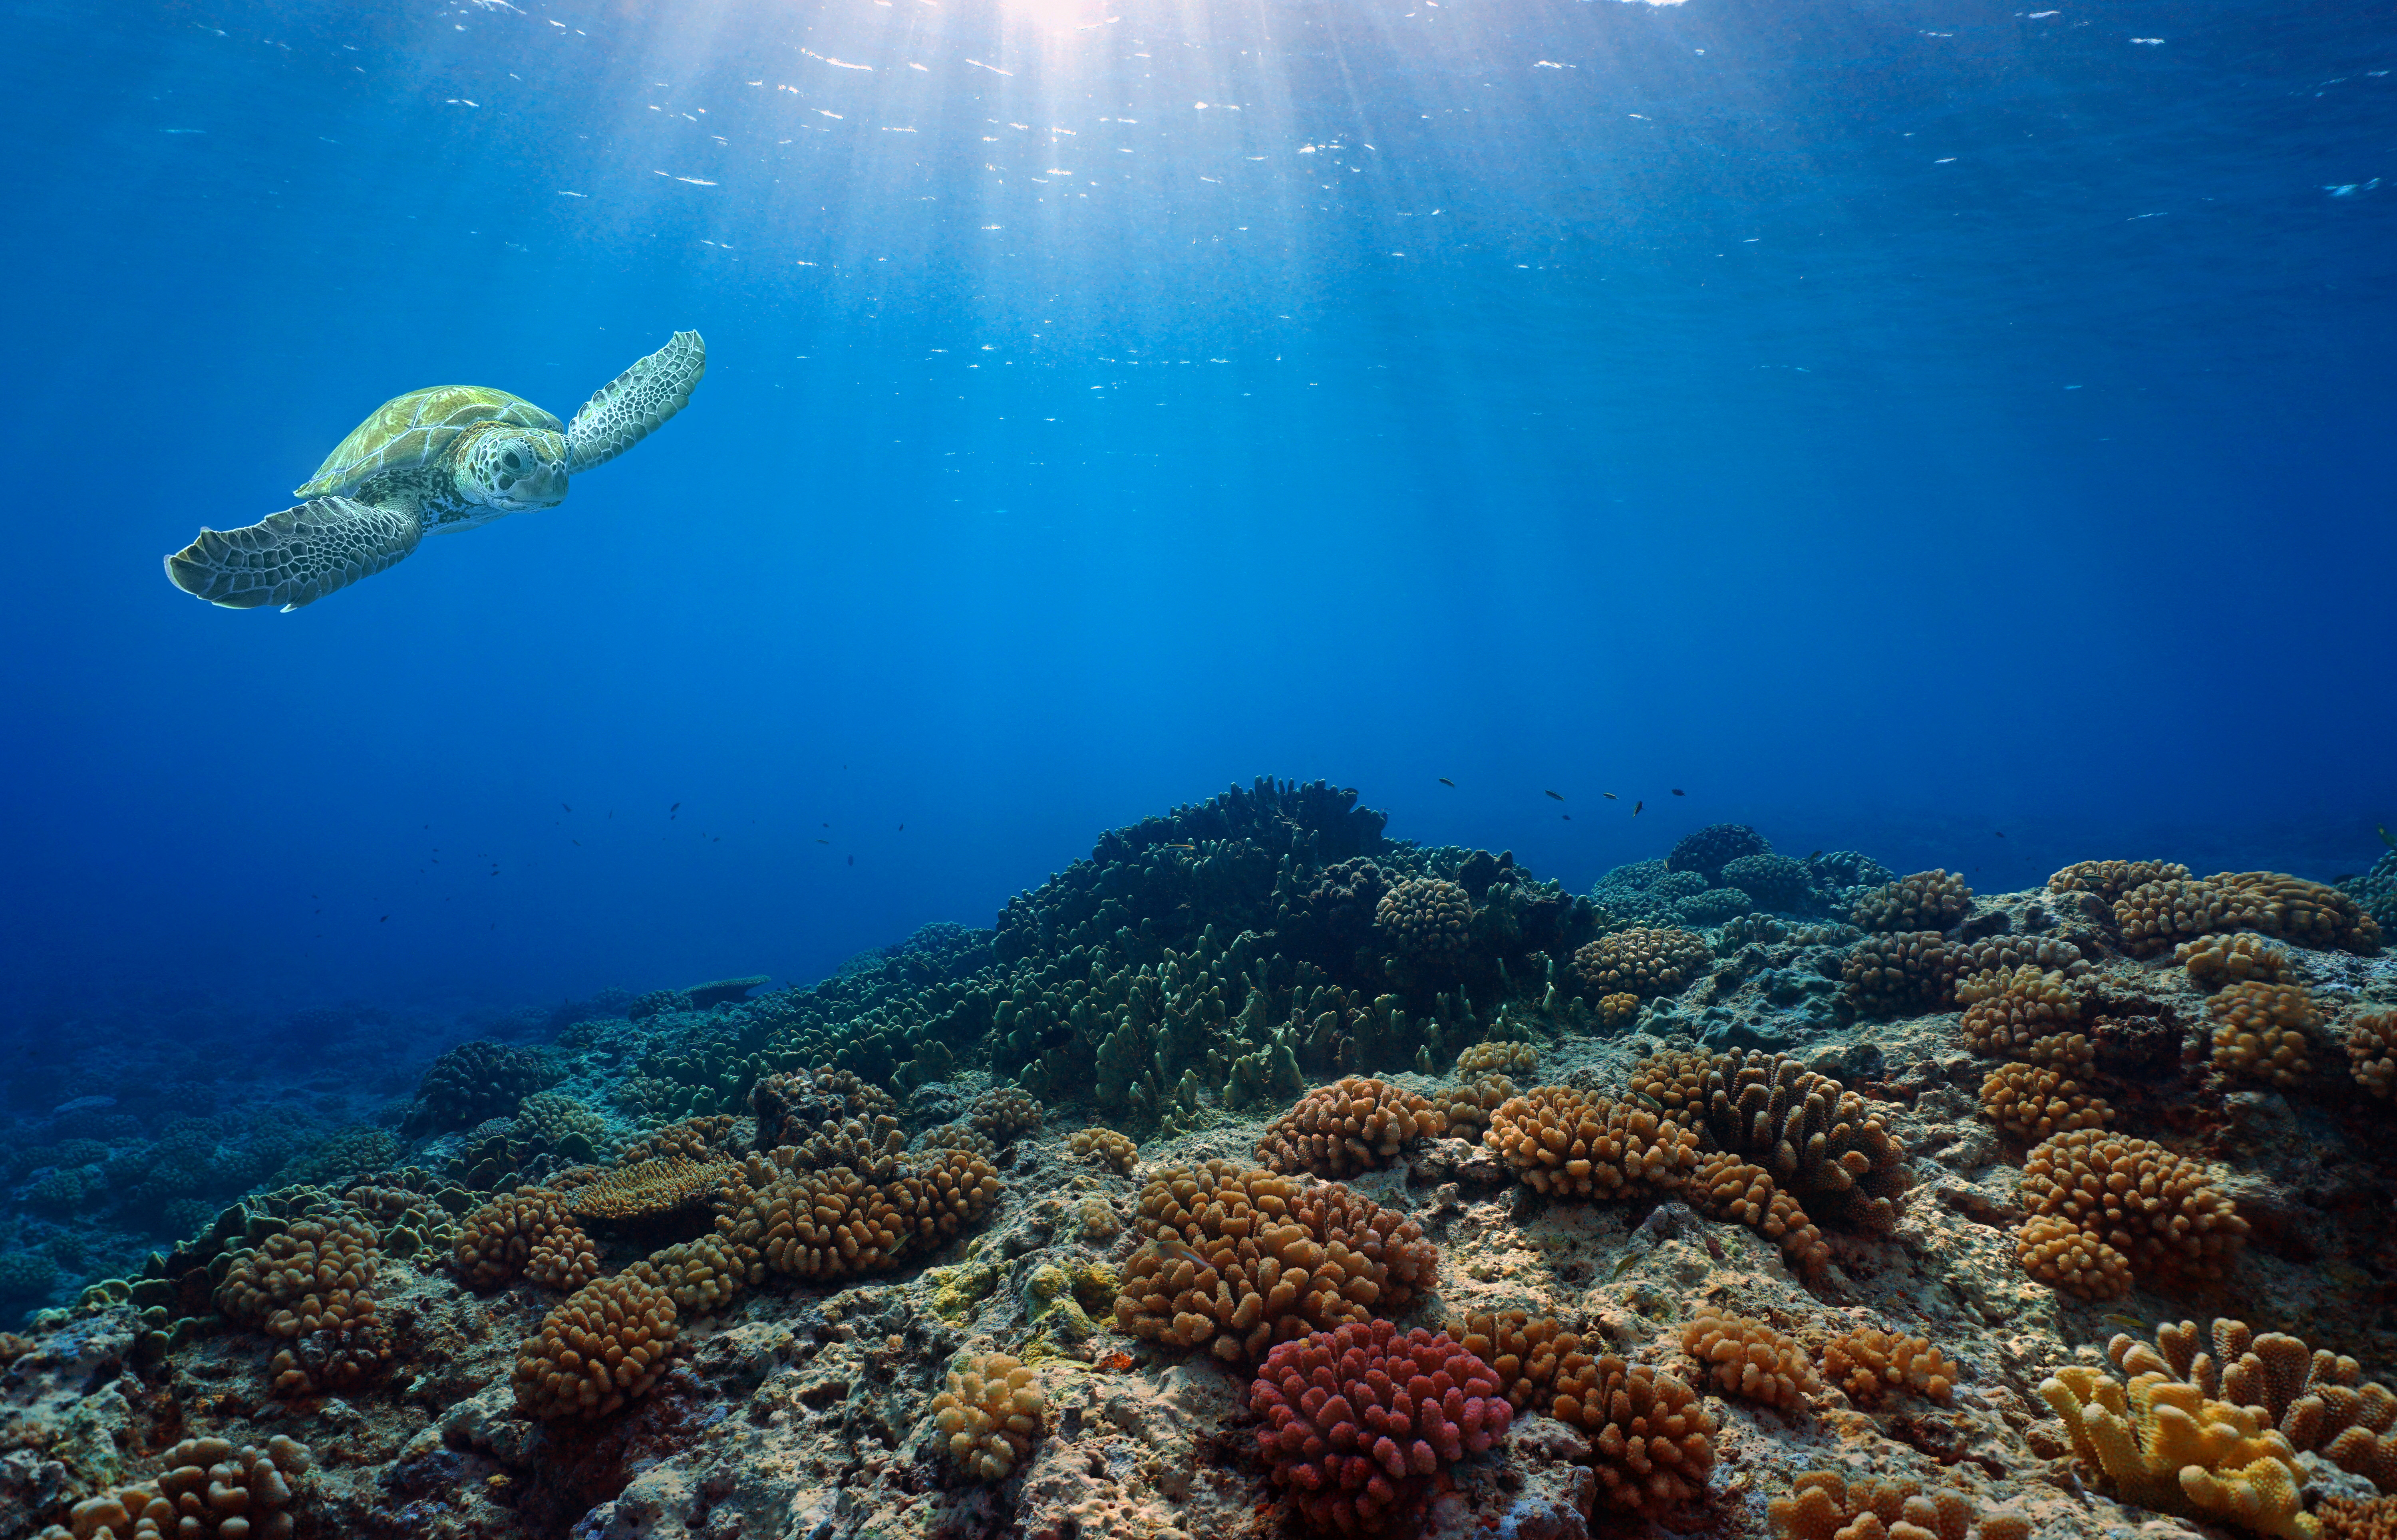
You can use pretty much anything in this step. For our purposes, we downloaded this underwater image from Shutterstock. Try browsing Pexels or Unsplash for free stock images, or create a scene using Photoshop’s Generative Fill Feature.

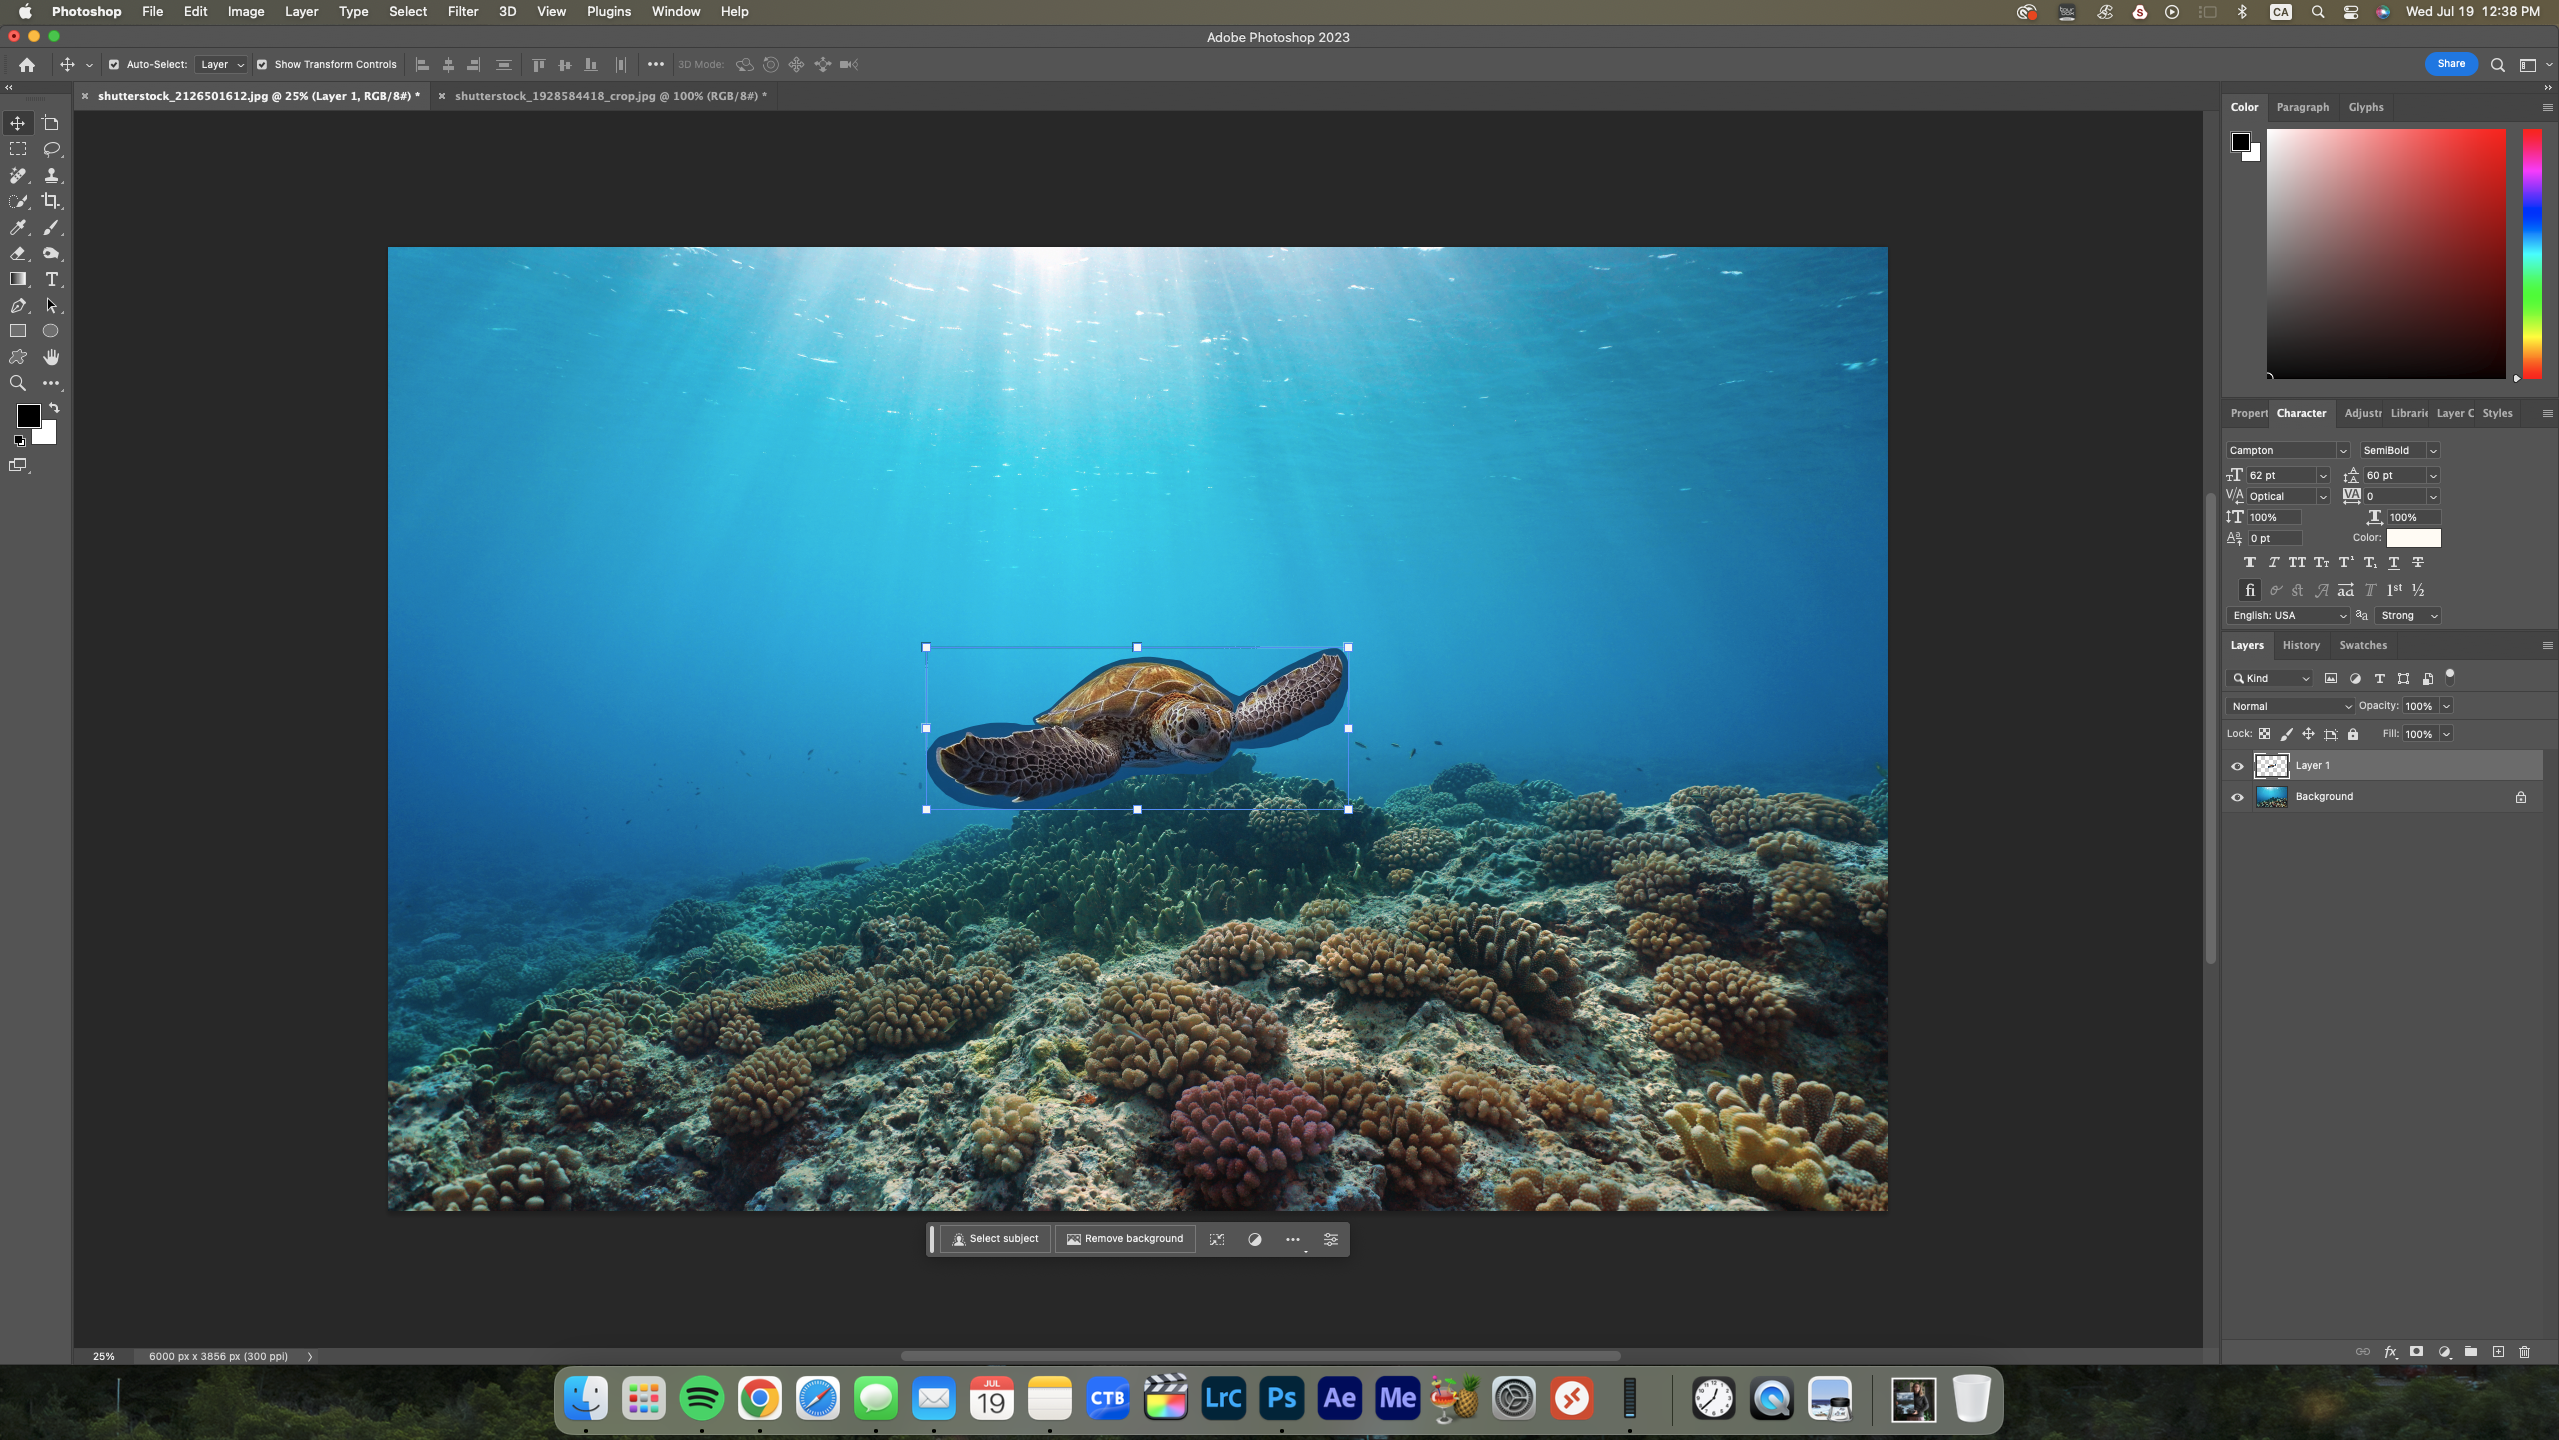
Step 2: Copy and paste the image or subject you wish to blend into your scene.
For this step, we recommend choosing a photo whose lighting, colours and tonality are already close to your background image. While not entirely required, as Photoshop applies a layer of colour adjustments, having your photos start with similar lighting will help produce a more convincing composite without as much fine-tuning. You can also blend an entire image onto your background or a single element selected using the Lasso tool.
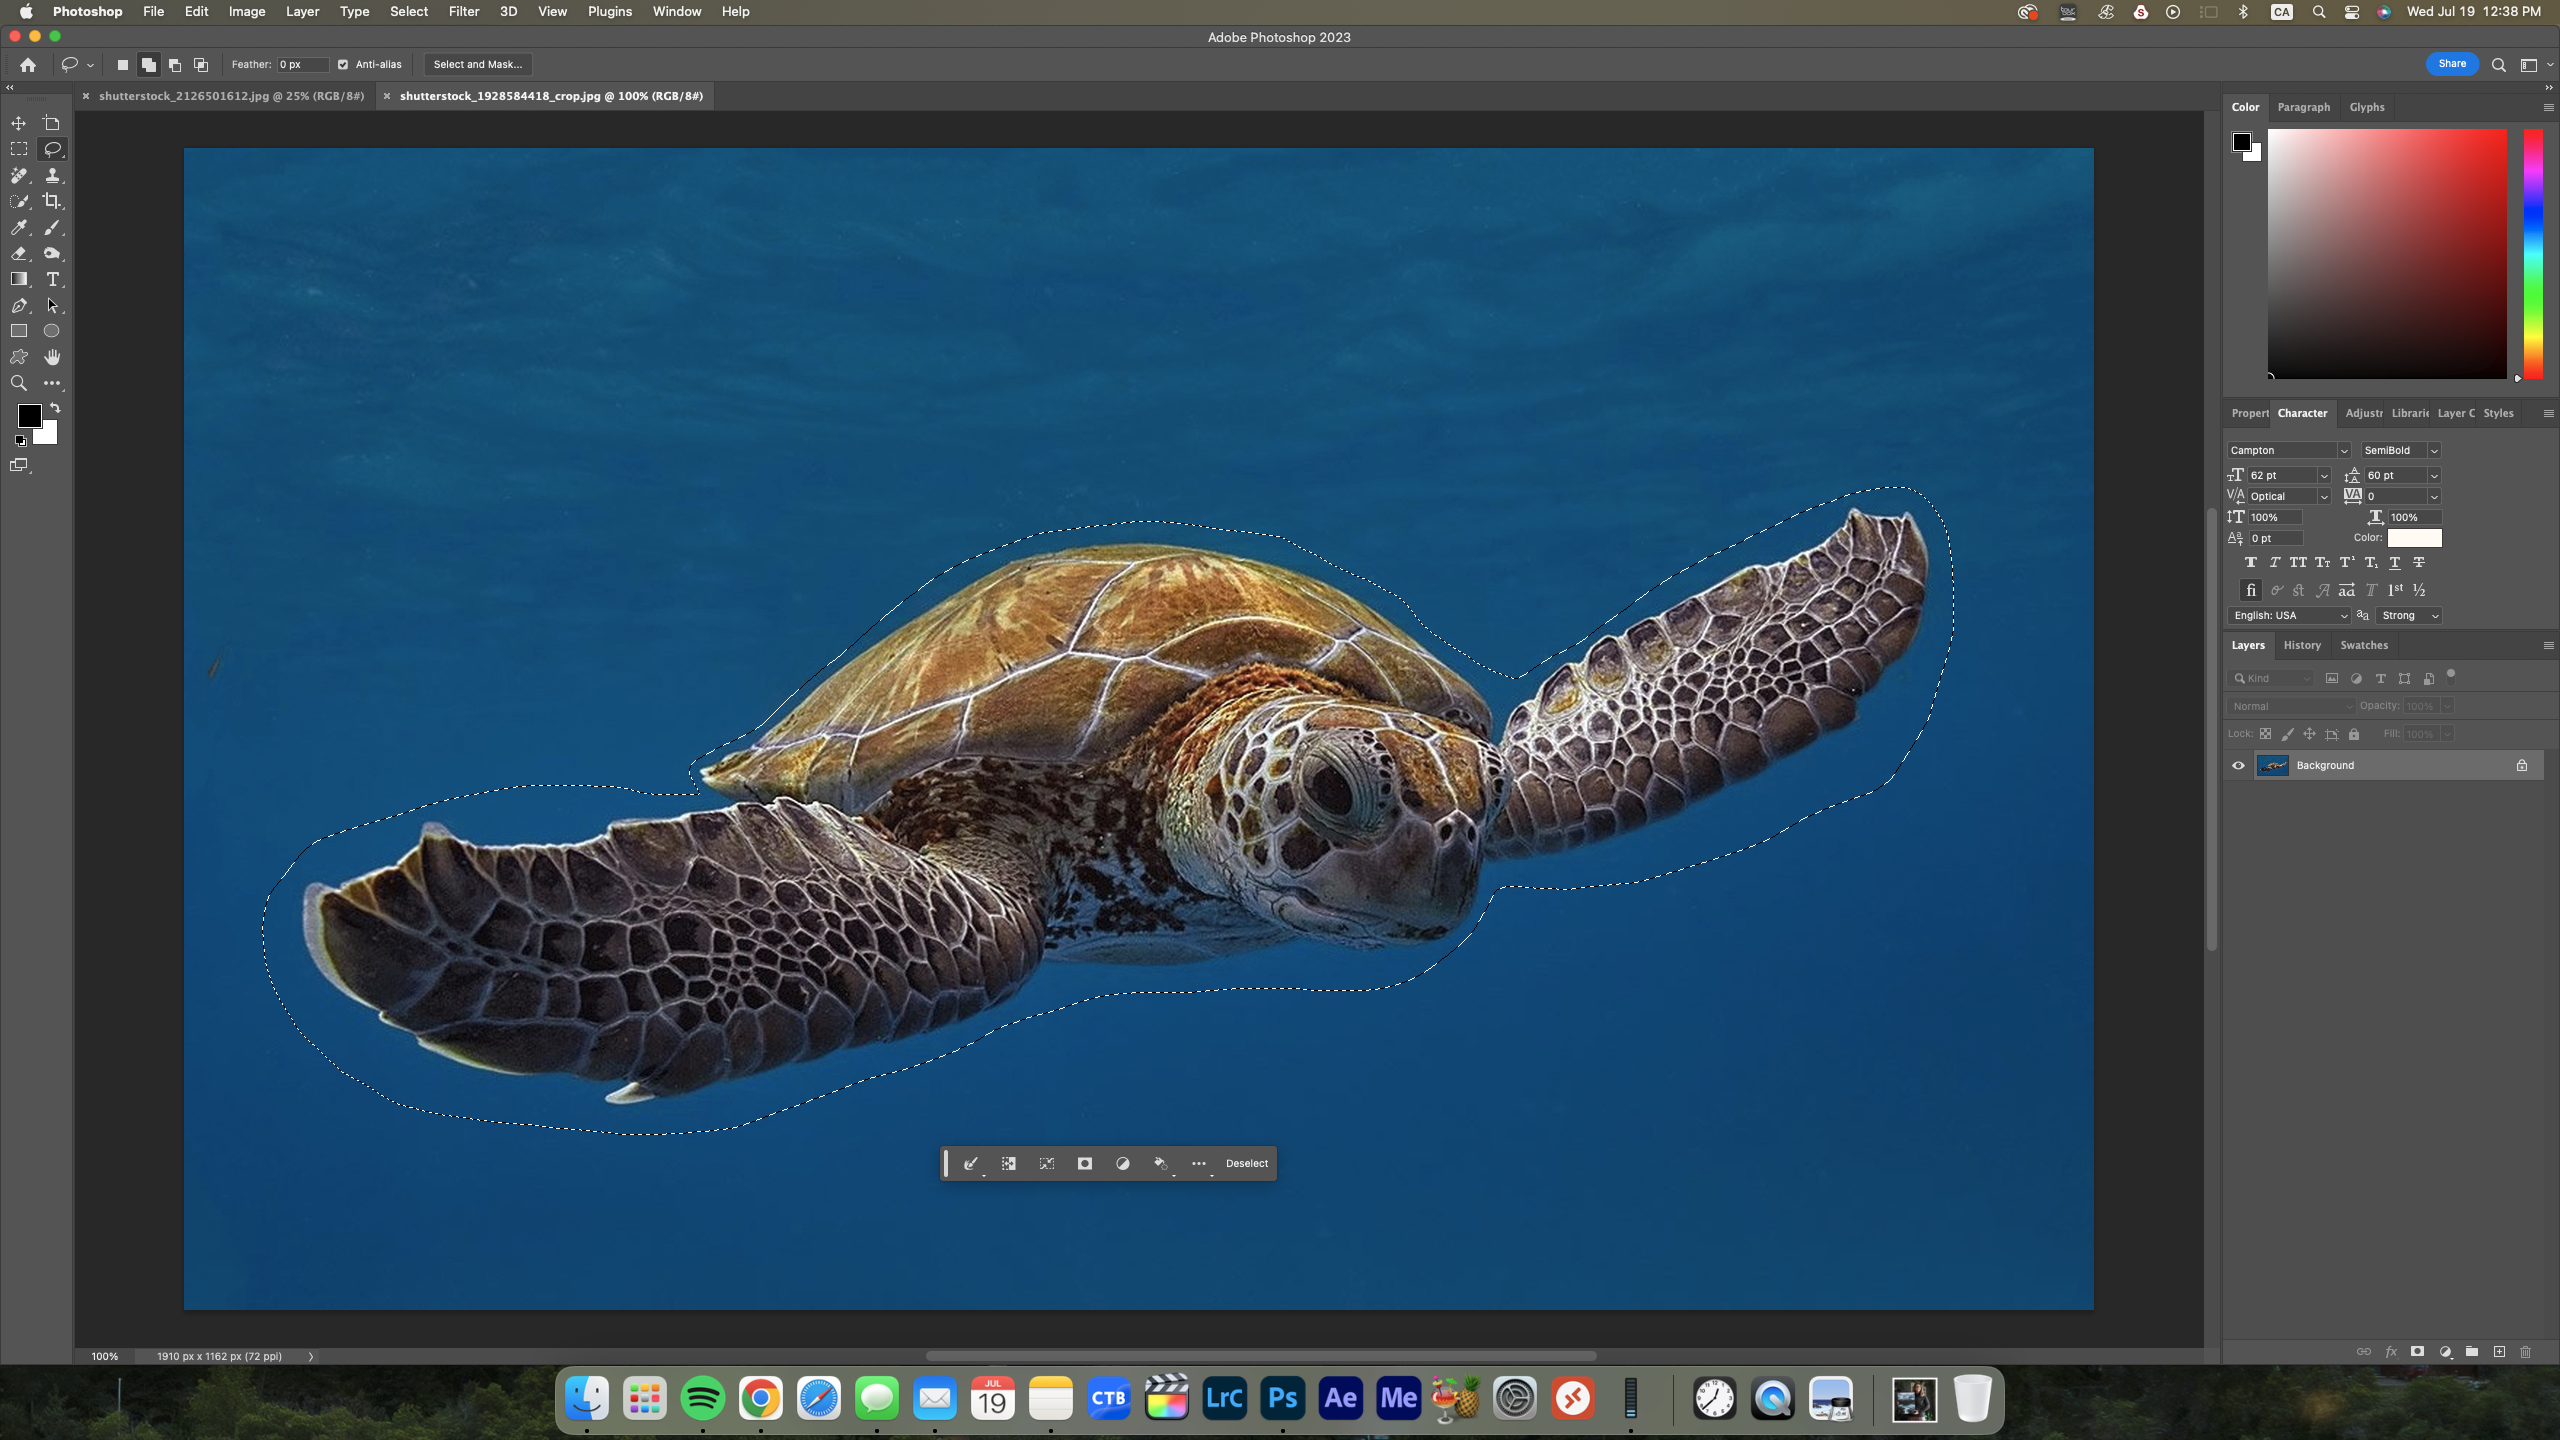
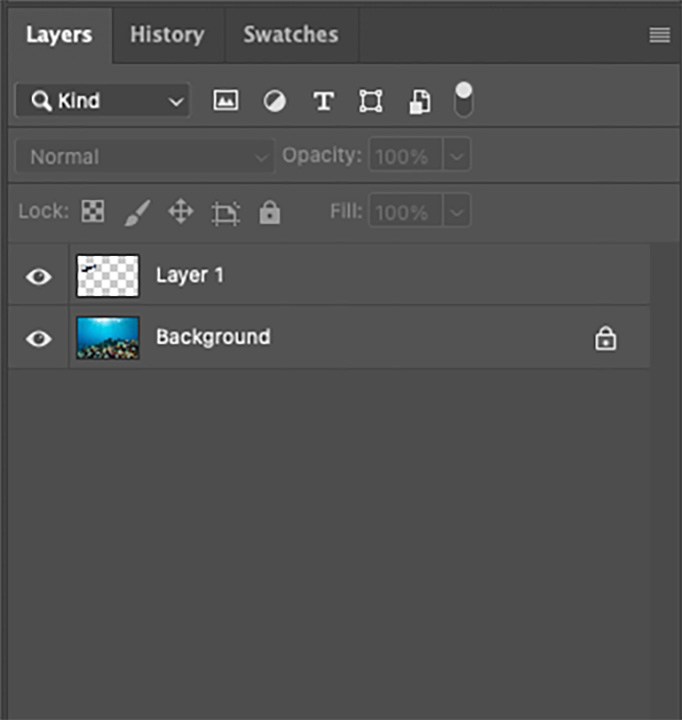
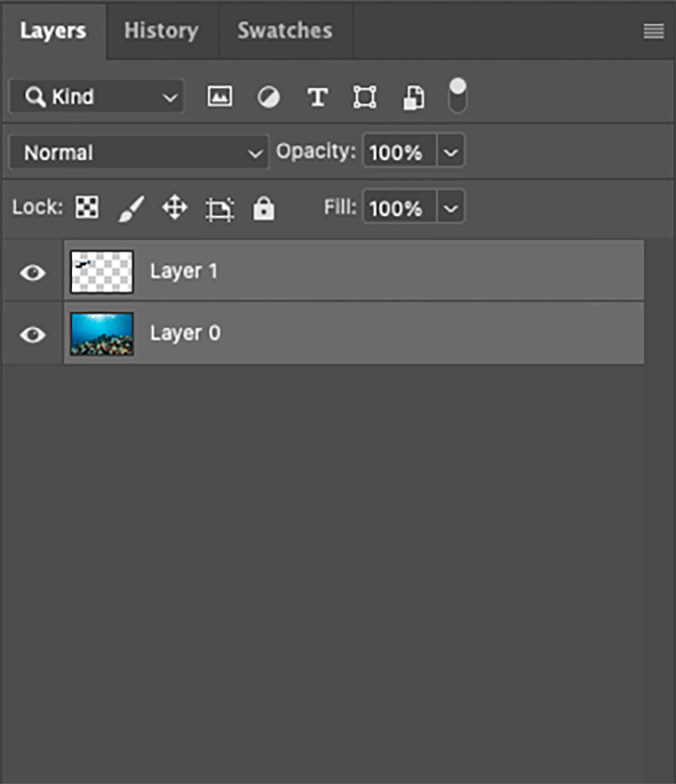
Step 3: Unlock the background layer and select all the layers you wish to blend.
While holding the Shift key, left-click on all the layers you wish to blend. Ensure that your Background layer is unlocked (by clicking the little lock icon on the right side of the Layer) and is displayed as "Layer 0" instead of "Background."
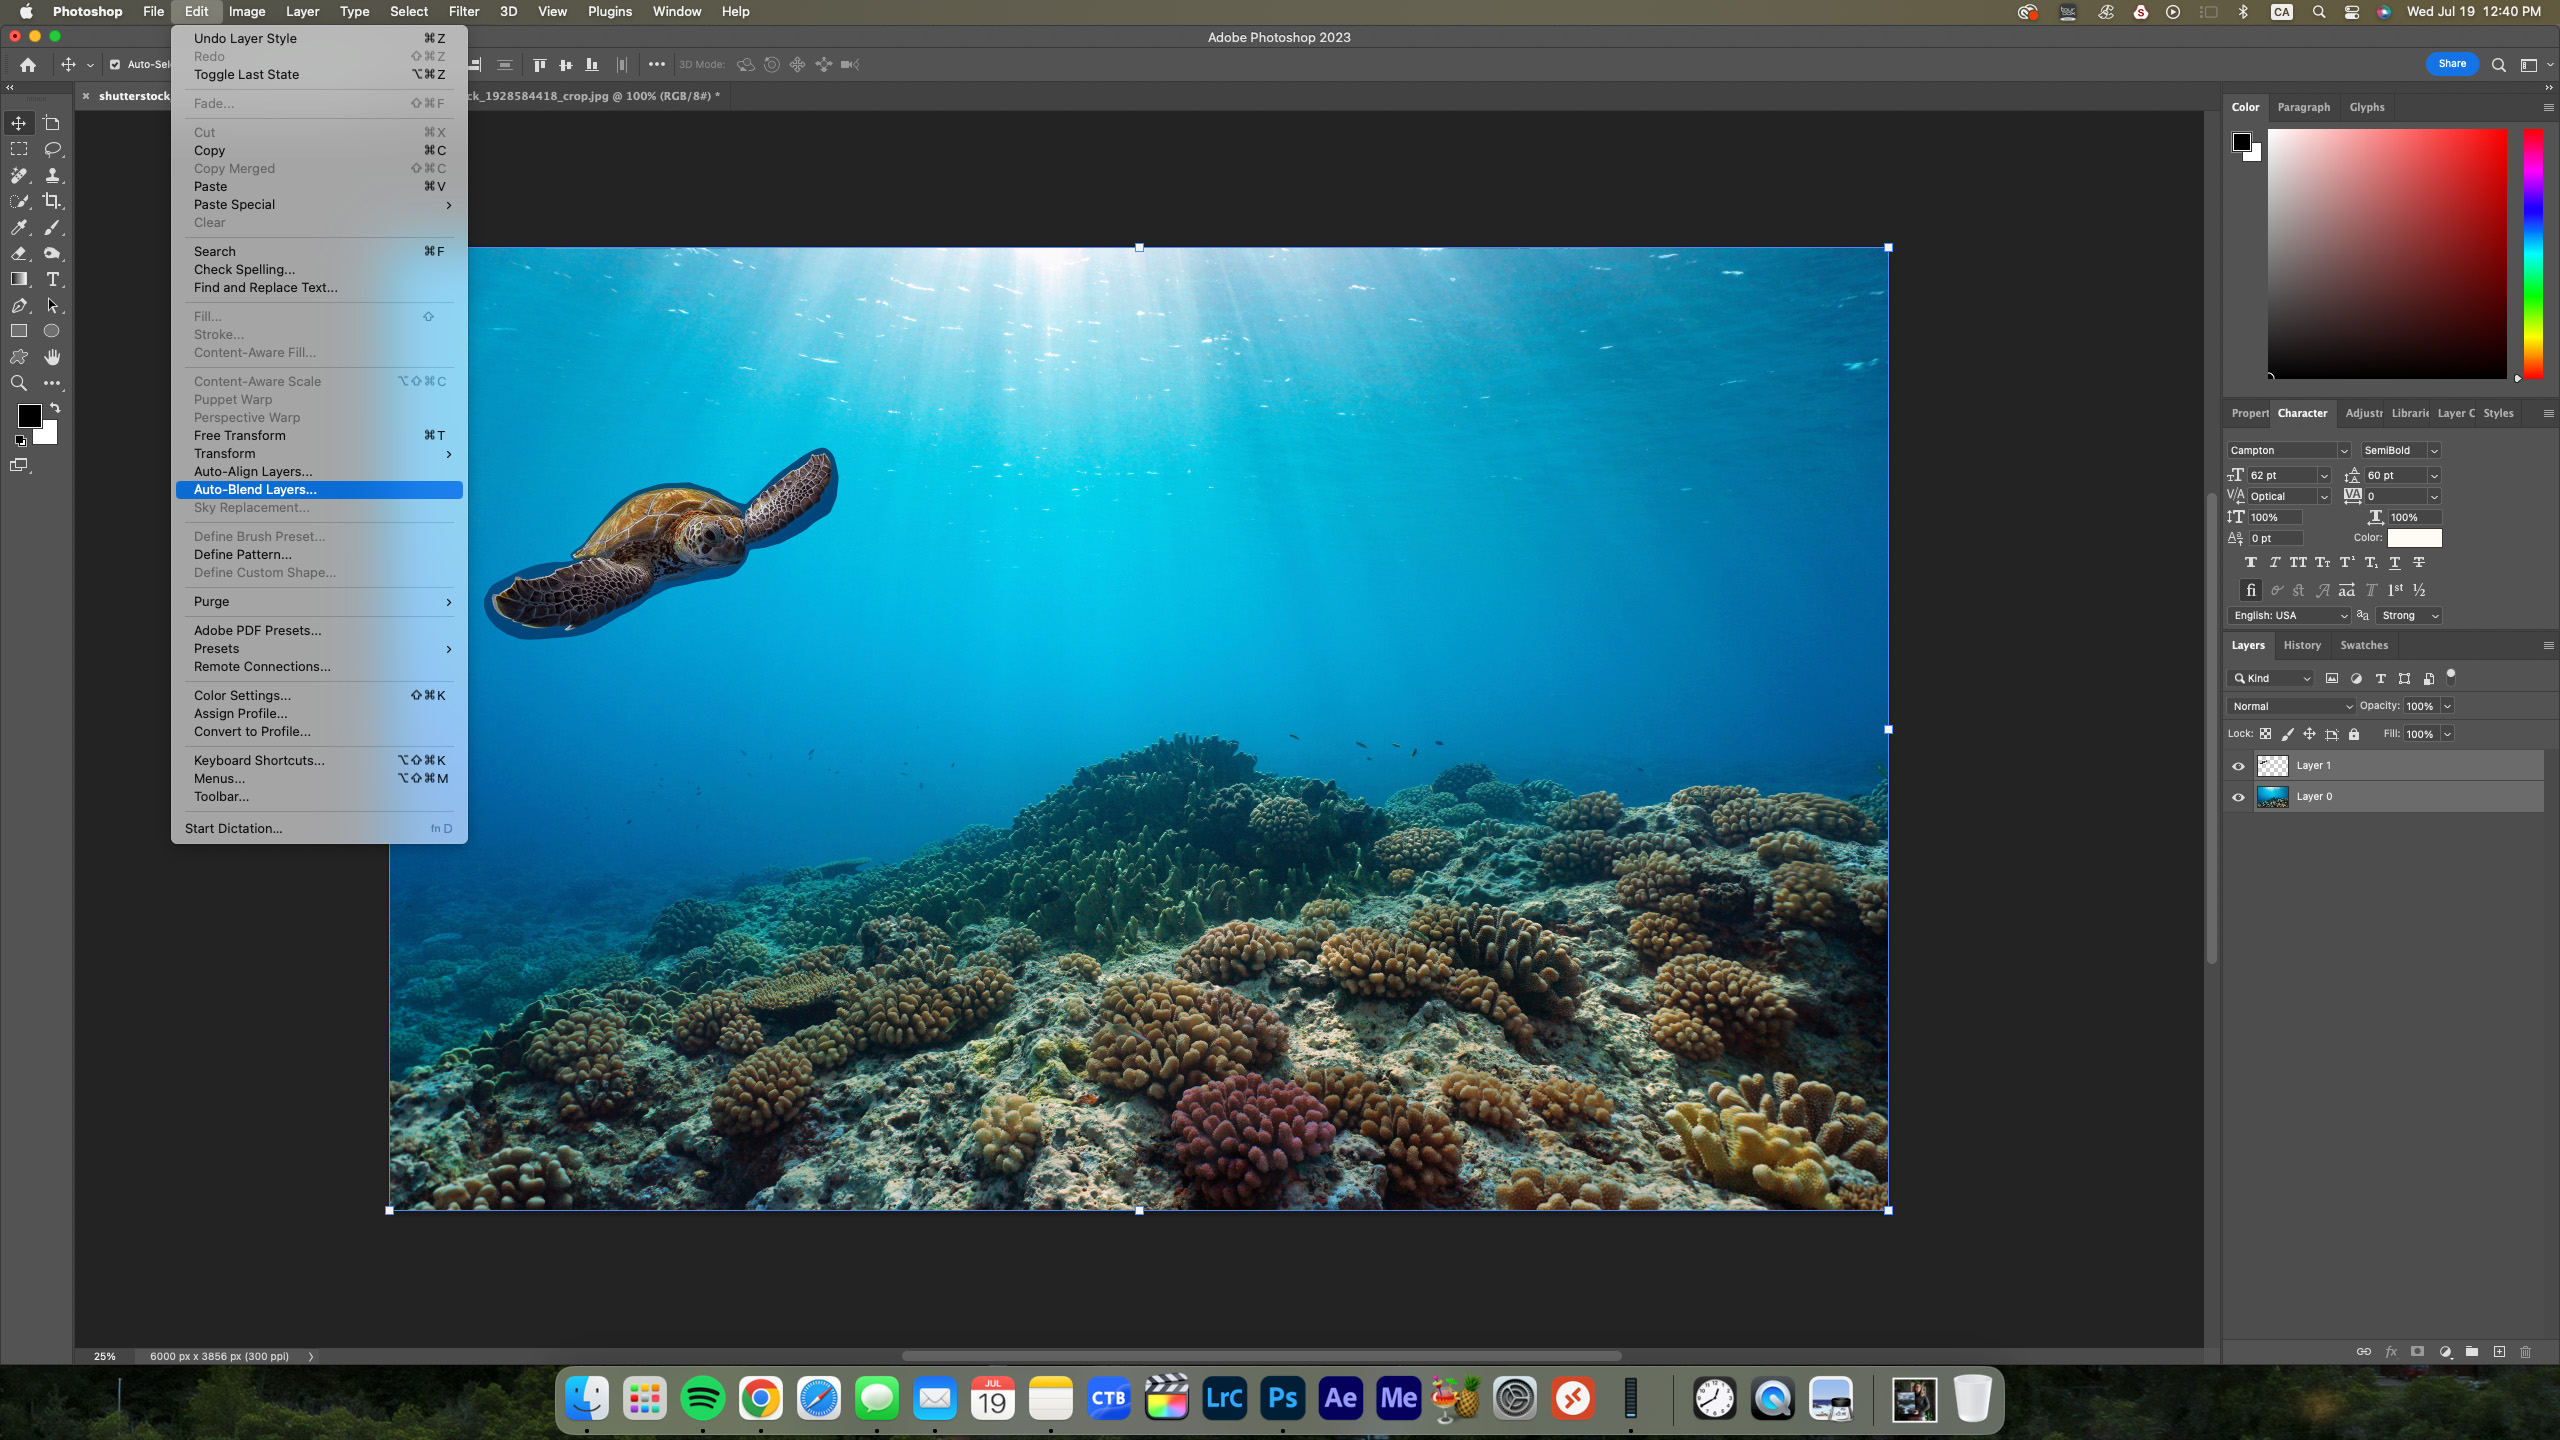
Step 4: Select “Auto Blend Layers” in the Edit menu.
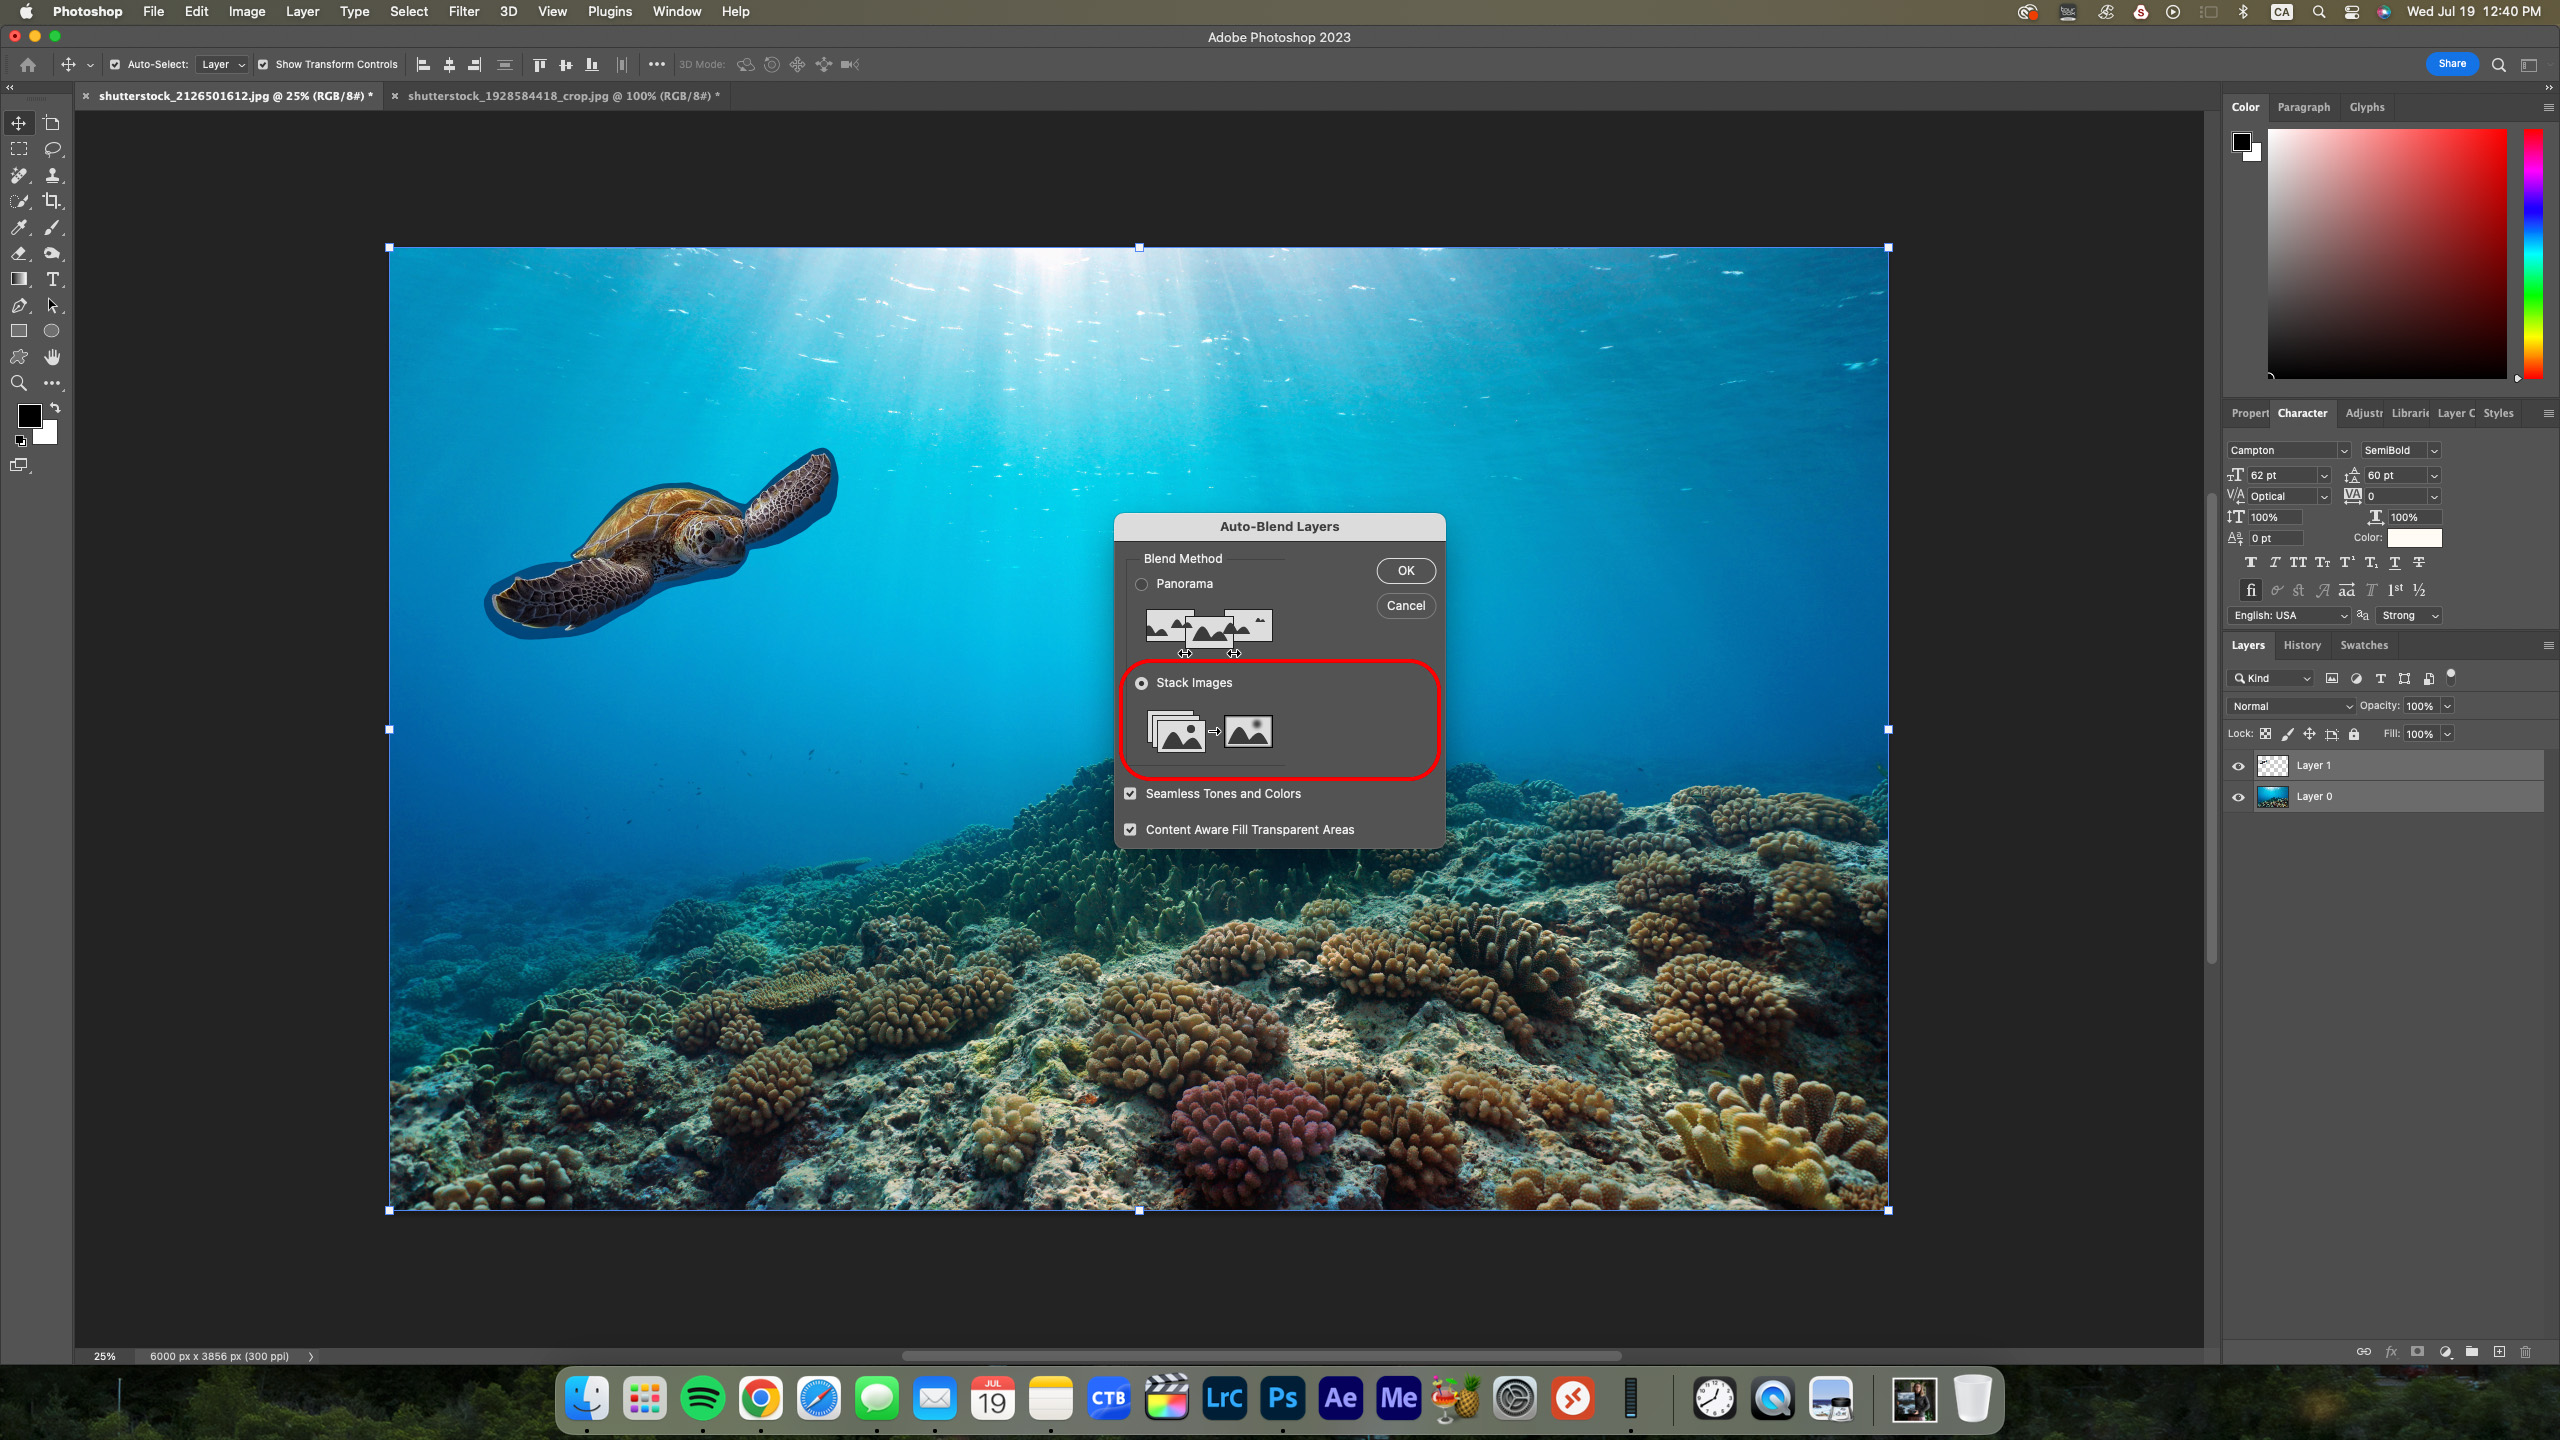
Once the layers you'd like to blend have been selected, navigate to the Edit tab on your computer's menu bar. Under Edit, near the bottom of the drop-down list, you will find an option for Auto Blend Layers. In the pop-up window, choose the "Stack Images" option and ensure that "Seamless Tones and Colors" and "Content Aware Fill Transparent Areas" are both checked.
Step 5: Hit “OK” and watch the magic happen.
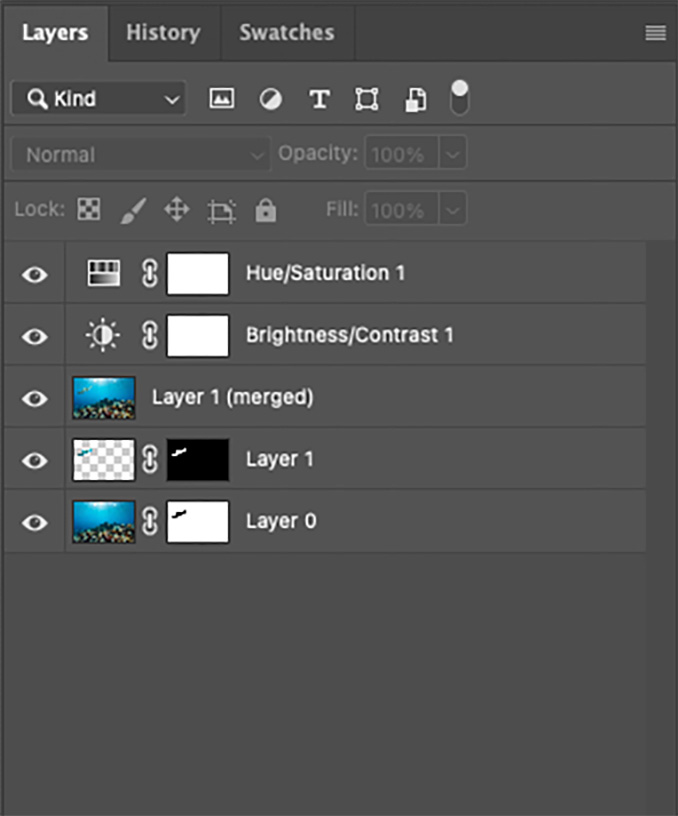
After a few seconds of loading, your composite should be ready. If needed, make any fine-tuning adjustments with a soft Spot Heal brush or by double-clicking the Layer Masks and adjusting them manually.
Step 6 (Optional): Edit the final composite with the creative look of your choice.
Now that our images have been combined and our composited elements match the colour and tonality of the background, we can edit the entire photo as normal. Be sure to make any adjustments on or above the newly created "merged" Layer to ensure your edits affect the whole image and don't interfere with your layer masks. The masked layers can also be edited individually if the automatic colour balancing isn't to your liking.
Auto Blend can also be used to create panoramic photos by following Steps 1 through 4 and selecting "Panorama" instead of "Stack Images" in the Auto Blend pop-up menu.
Here is an example of a panoramic photo created by blending three photos from a drone:

Auto Blend is by no means a perfect solution for every situation, sometimes producing unusable results- especially when attempting to blend two different layers with wildly different colours and tones. That being said, Auto Blend is an impressive feature that can certainly help to speed up your editing workflow!